

Build a CI/CD Pipeline over AWS using Docker, Jenkins, SonarQube and EKS.


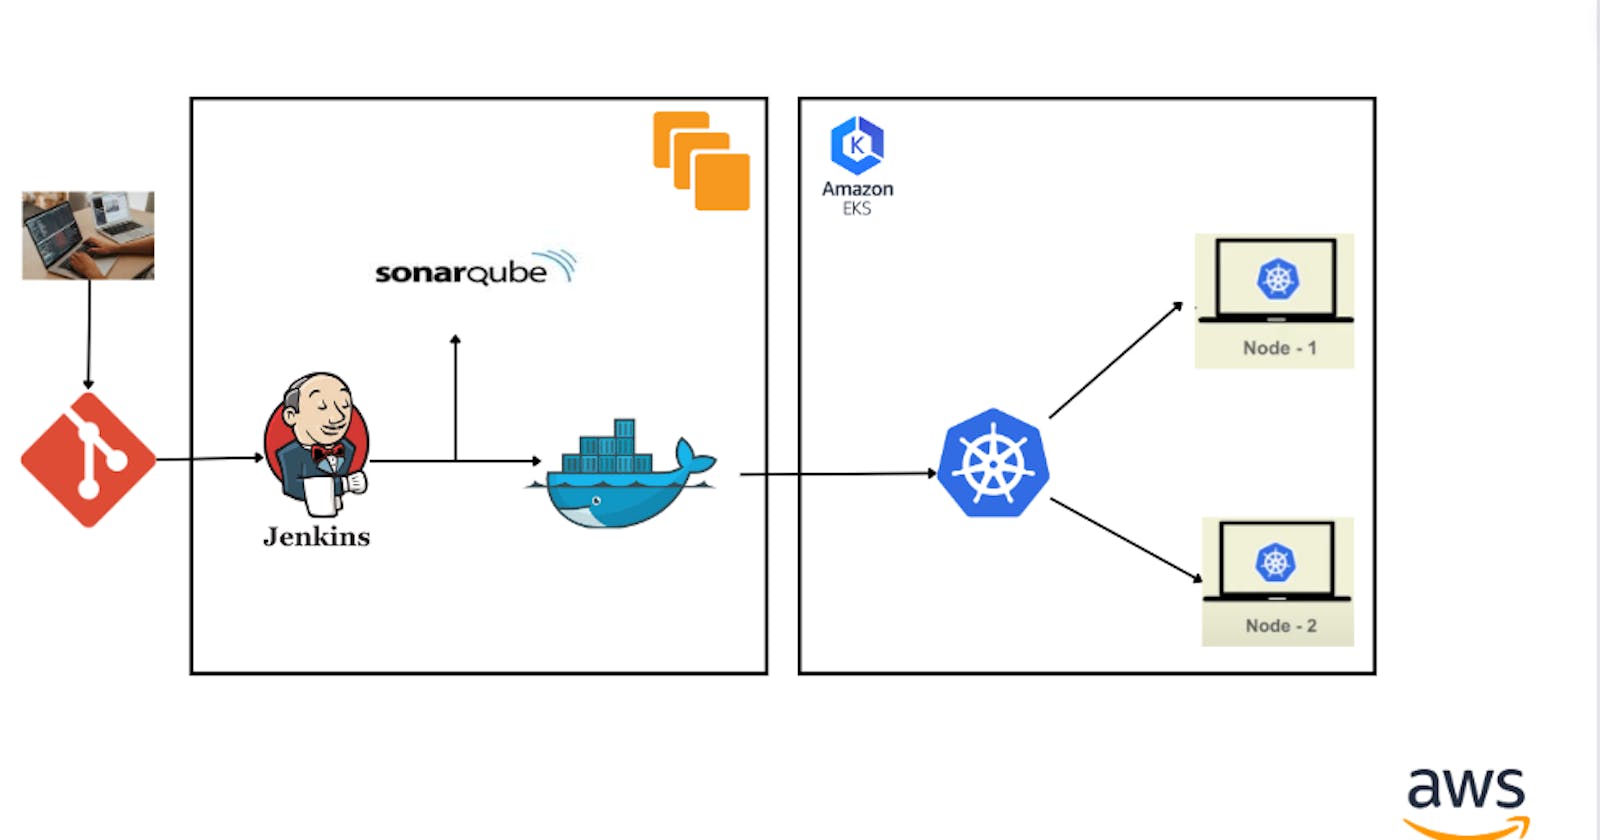
In this blog, we explore the process of creating a CI/CD pipeline for a web application using Jenkins, SonarQube, and Docker. We cover setting up the necessary tools, integrating with GitHub, performing static code analysis, and deploying to Kubernetes using Amazon EKS. By following this guide, you'll be able to automate the development, testing, and deployment processes, leading to faster and more efficient software delivery.
Pre-requisites
The key prerequisites for setting up a CI/CD pipeline for a web application are:
Git Repository: Have a Git repository set up to host your application's source code. This will allow for version control and easy integration with the CI/CD pipeline.
AWS Account: Access to an AWS account is required to create and manage infrastructure resources. To learn more, visit aws.amazon.com/free
Familiarity with Kubernetes: Understand the basics of Kubernetes to deploy and manage your application using EKS.
Knowledge of Jenkinsfile: Familiarize yourself with creating a Jenkinsfile, which defines the stages and steps of your CI/CD pipeline. This file will be used to automate the build, test, and deployment processes.
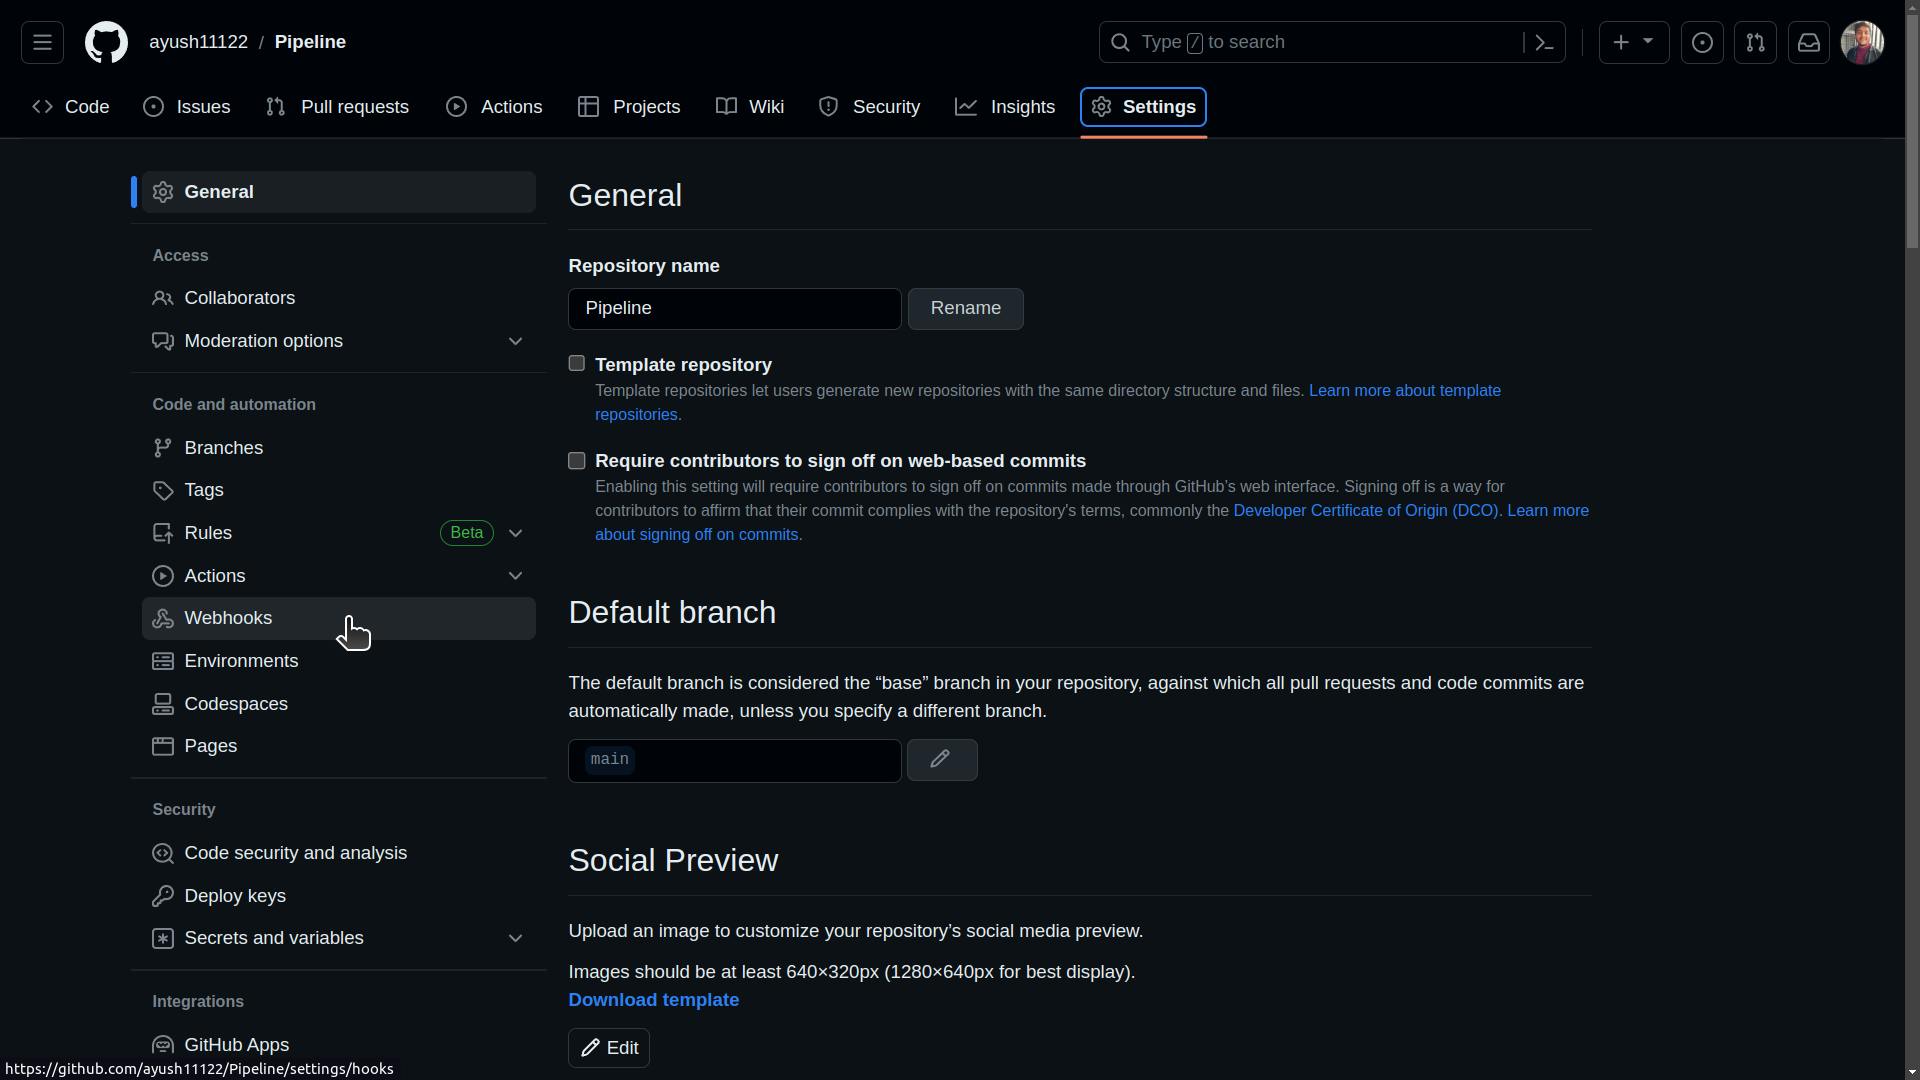
Create your virtual space to build a pipeline
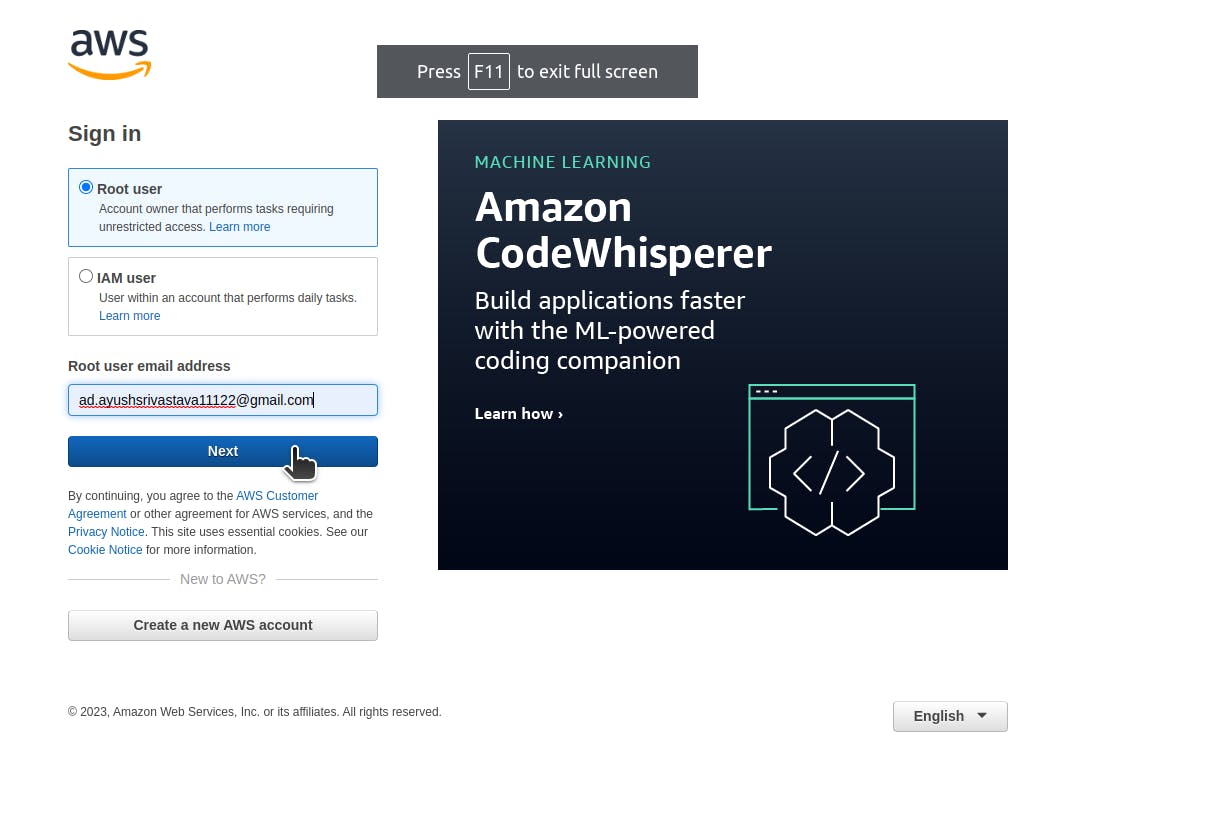
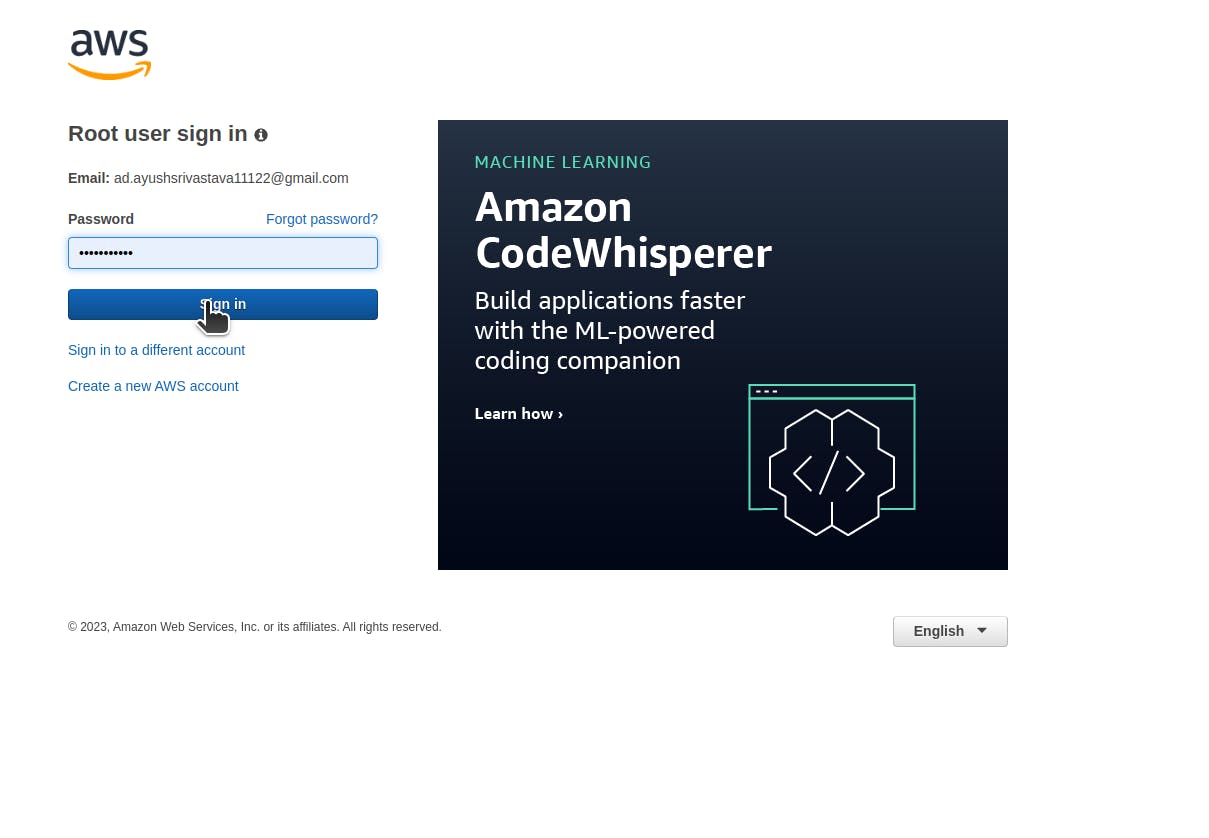
Login to your AWS account
Go to AWS Amazon services and sign in to your account.

Enter your account Username or Email Id.
Enter your account password.
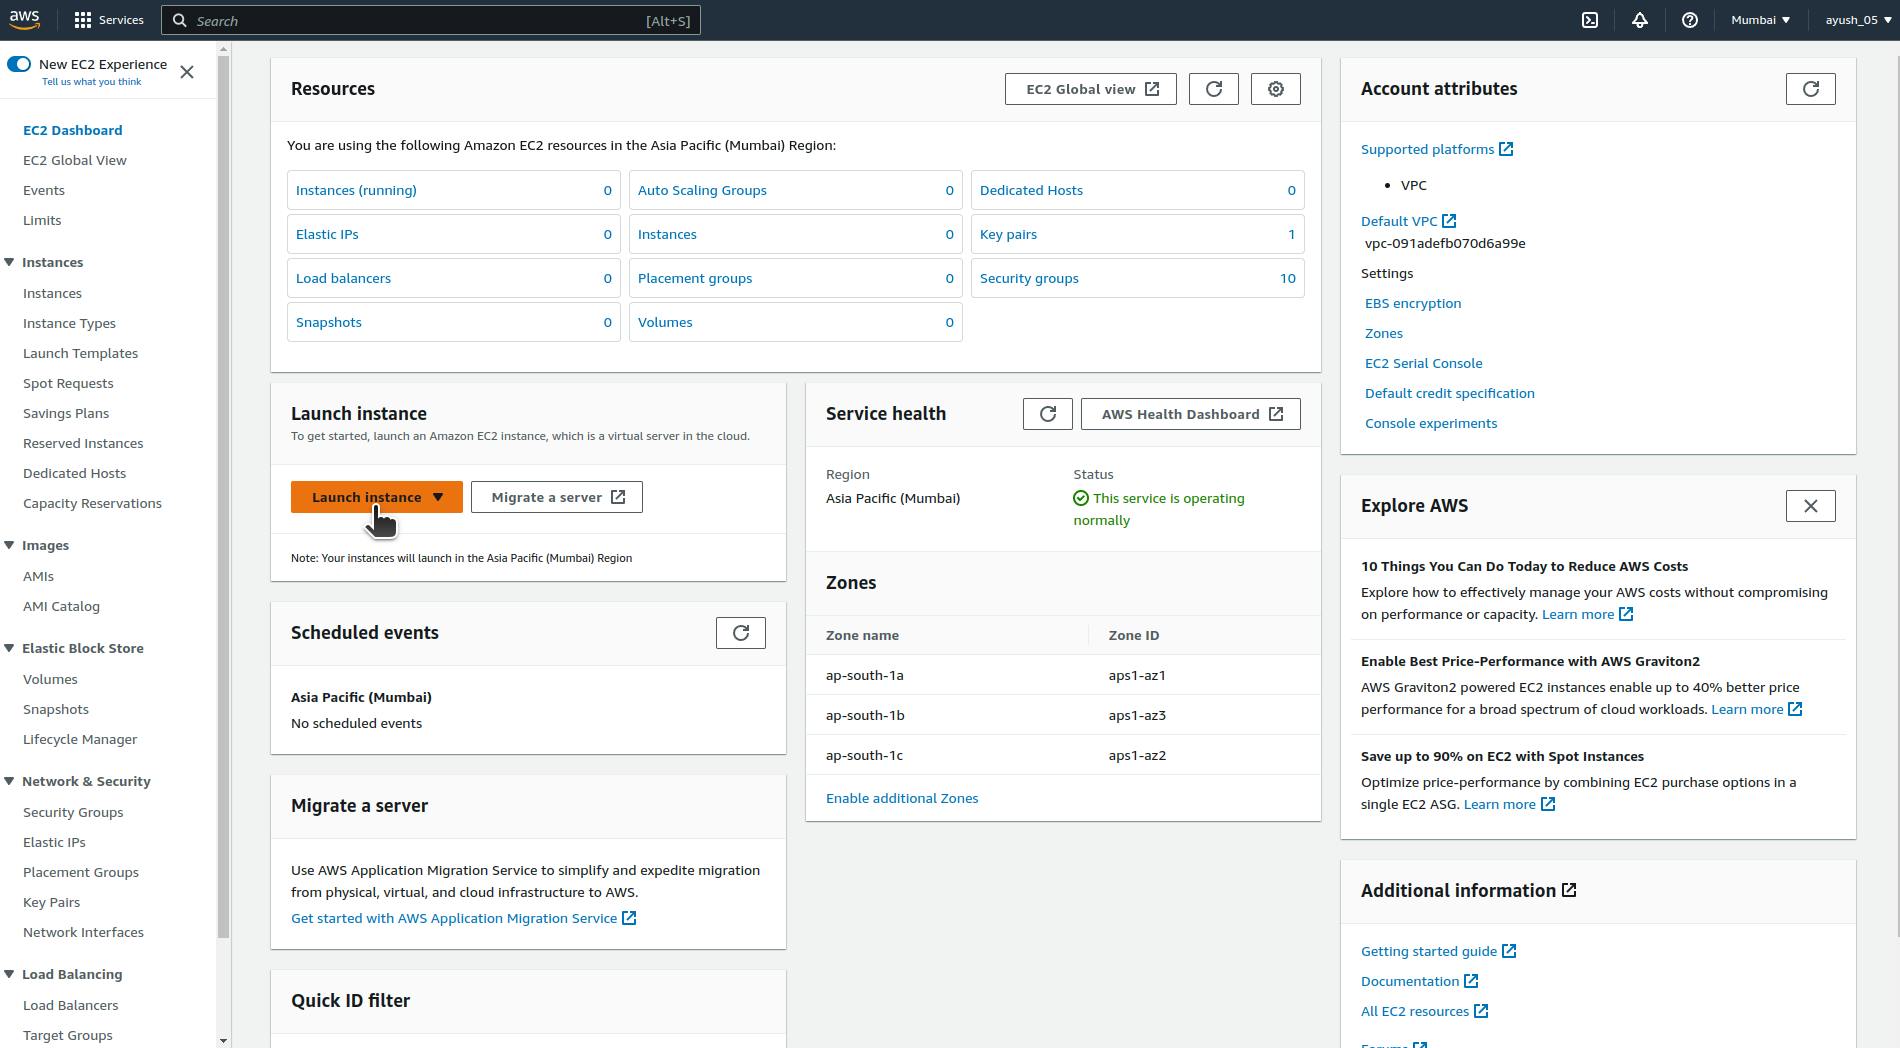
Create your EC2 Instances.
Go to EC2.

Click on Launch Instance.
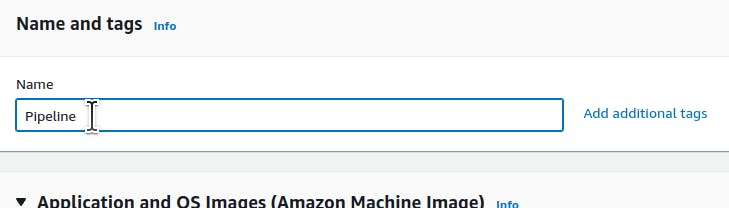
Give the name of your Instance.
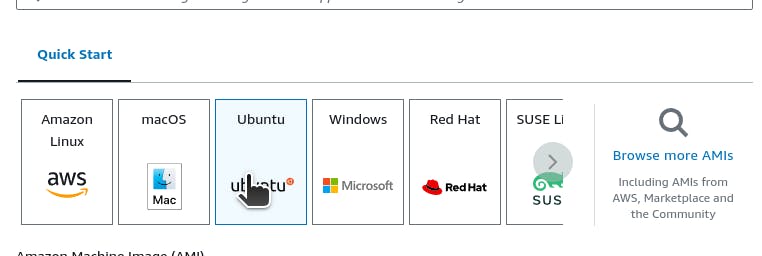
Select the AMI(Amazon Machine Image) of your Instance.
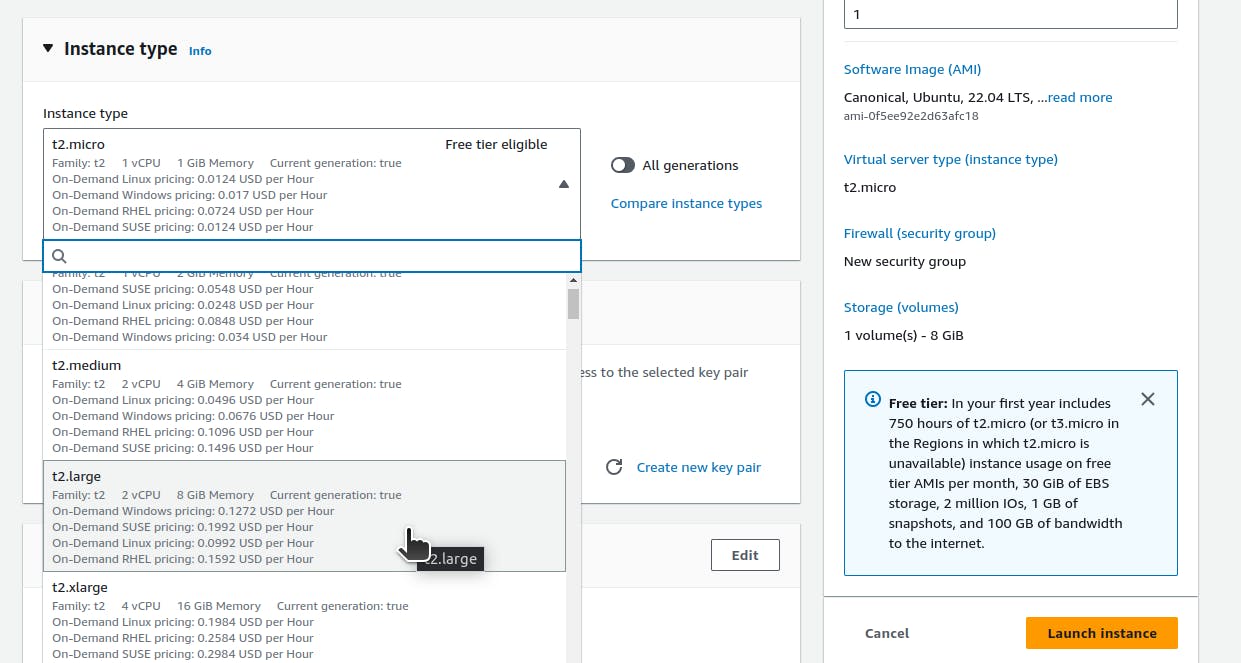
Select an instance type that meets your computing, memory, networking, or storage needs.
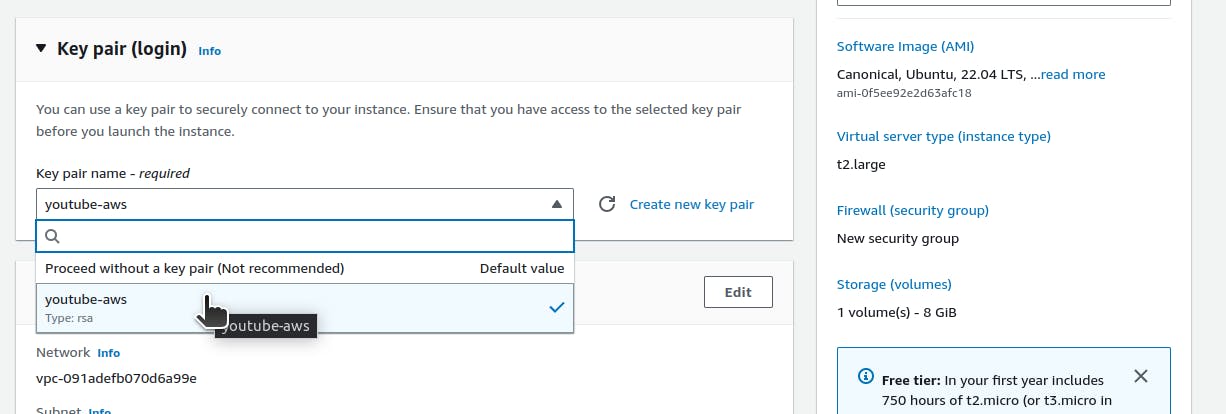
To specify a key pair in your launch template, you can select the key pair from the Key pair name field.
Click on Launch Instance.
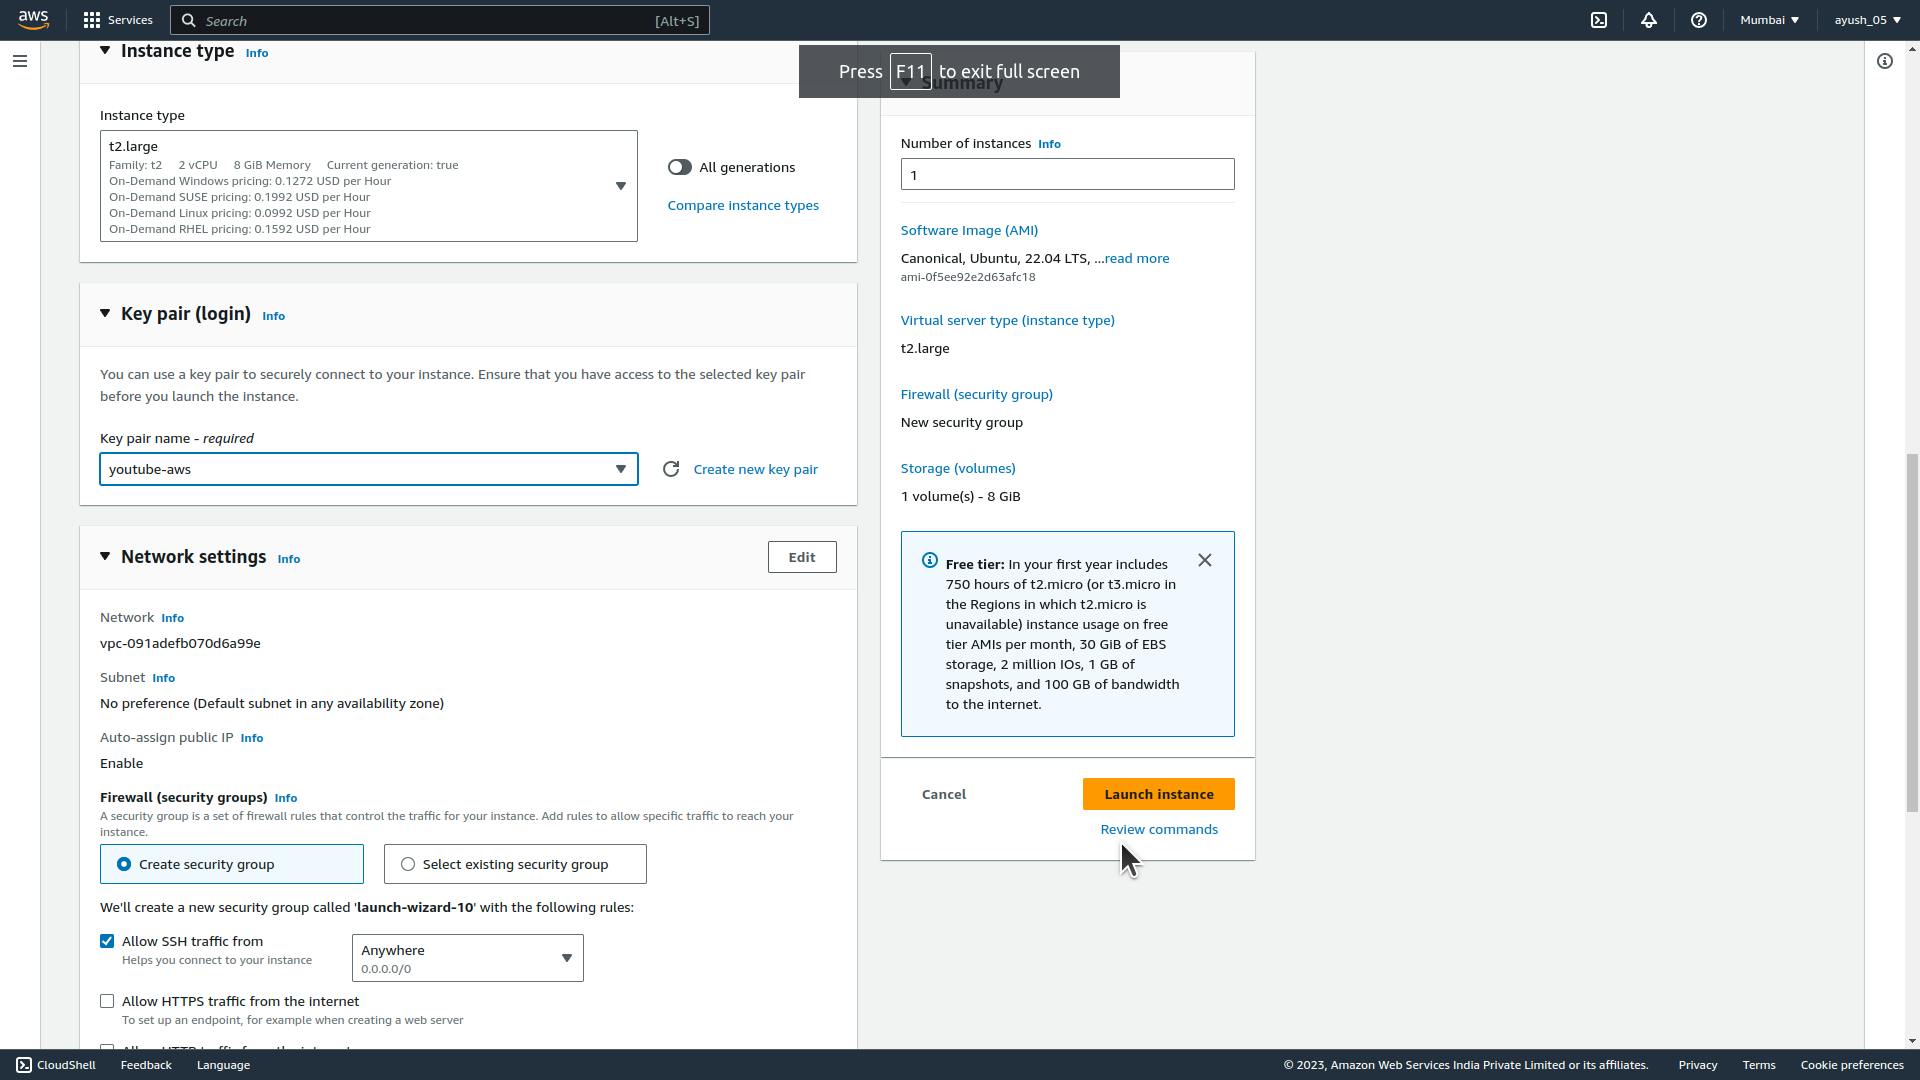
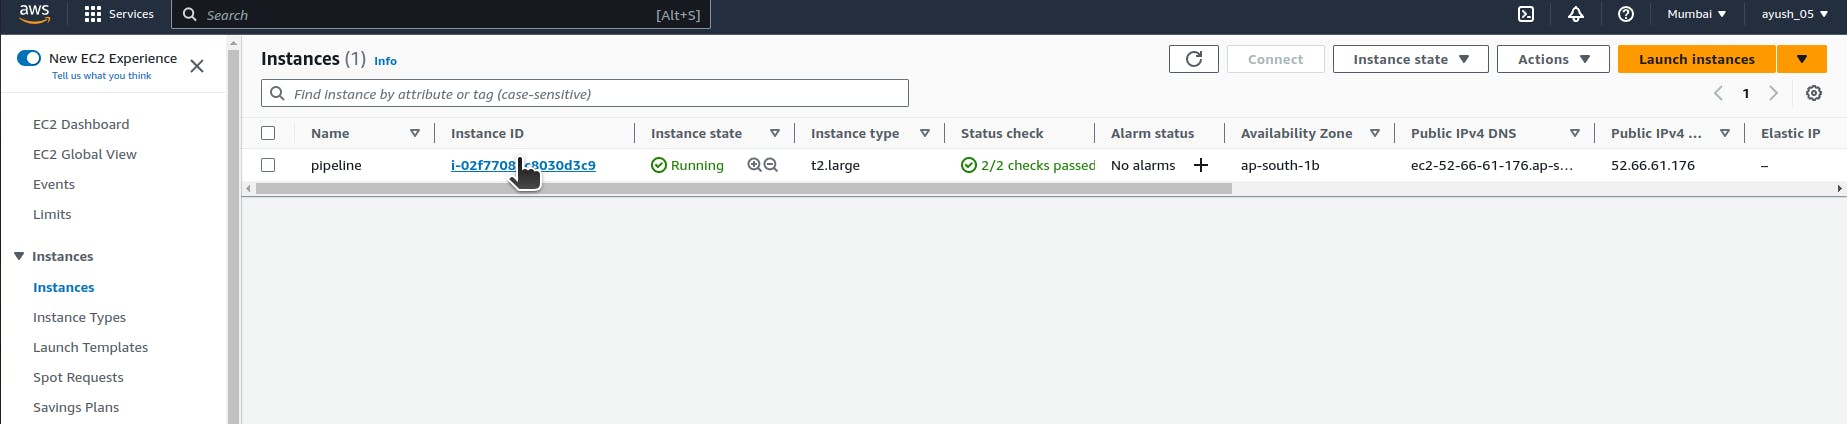
Your EC2 Instance is created.

Setting up your Security groups.
Go to your Instance.
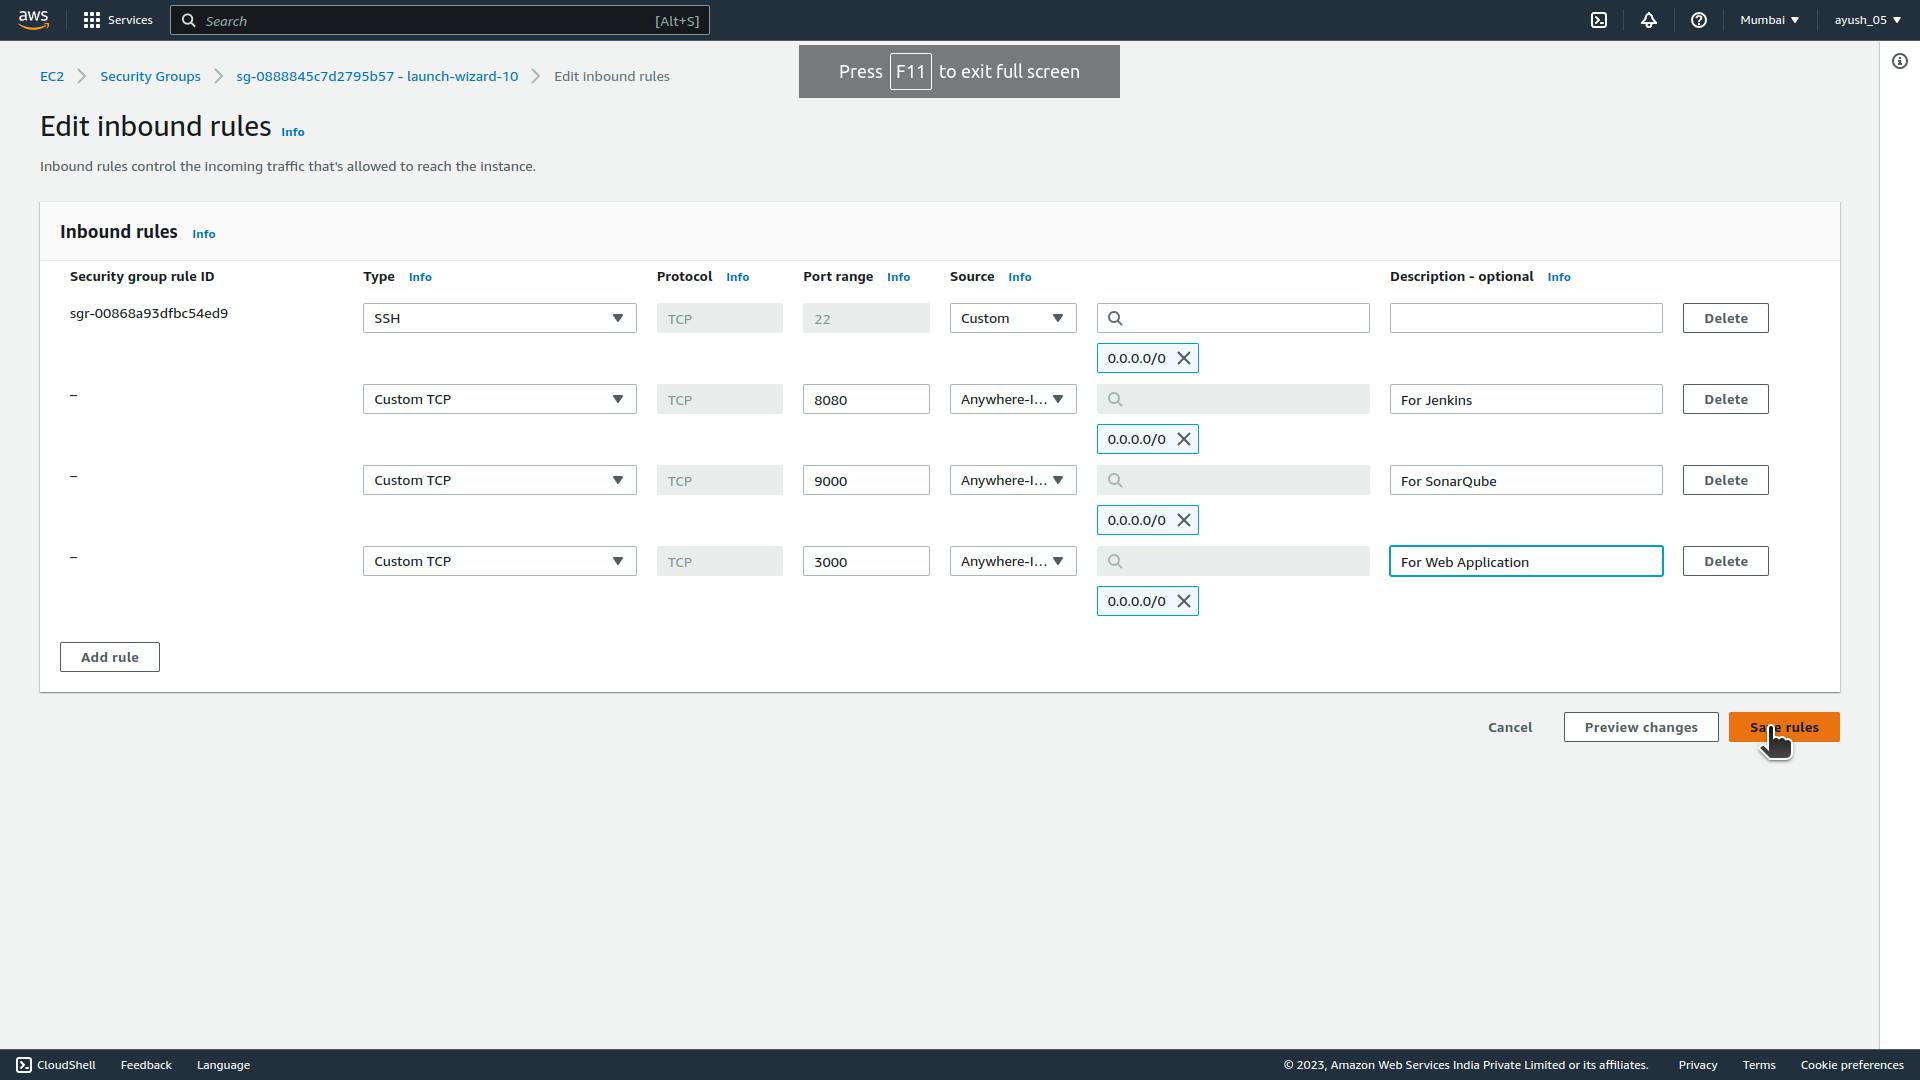
Go to Security Group and under Inbound rules, click on Security group name.
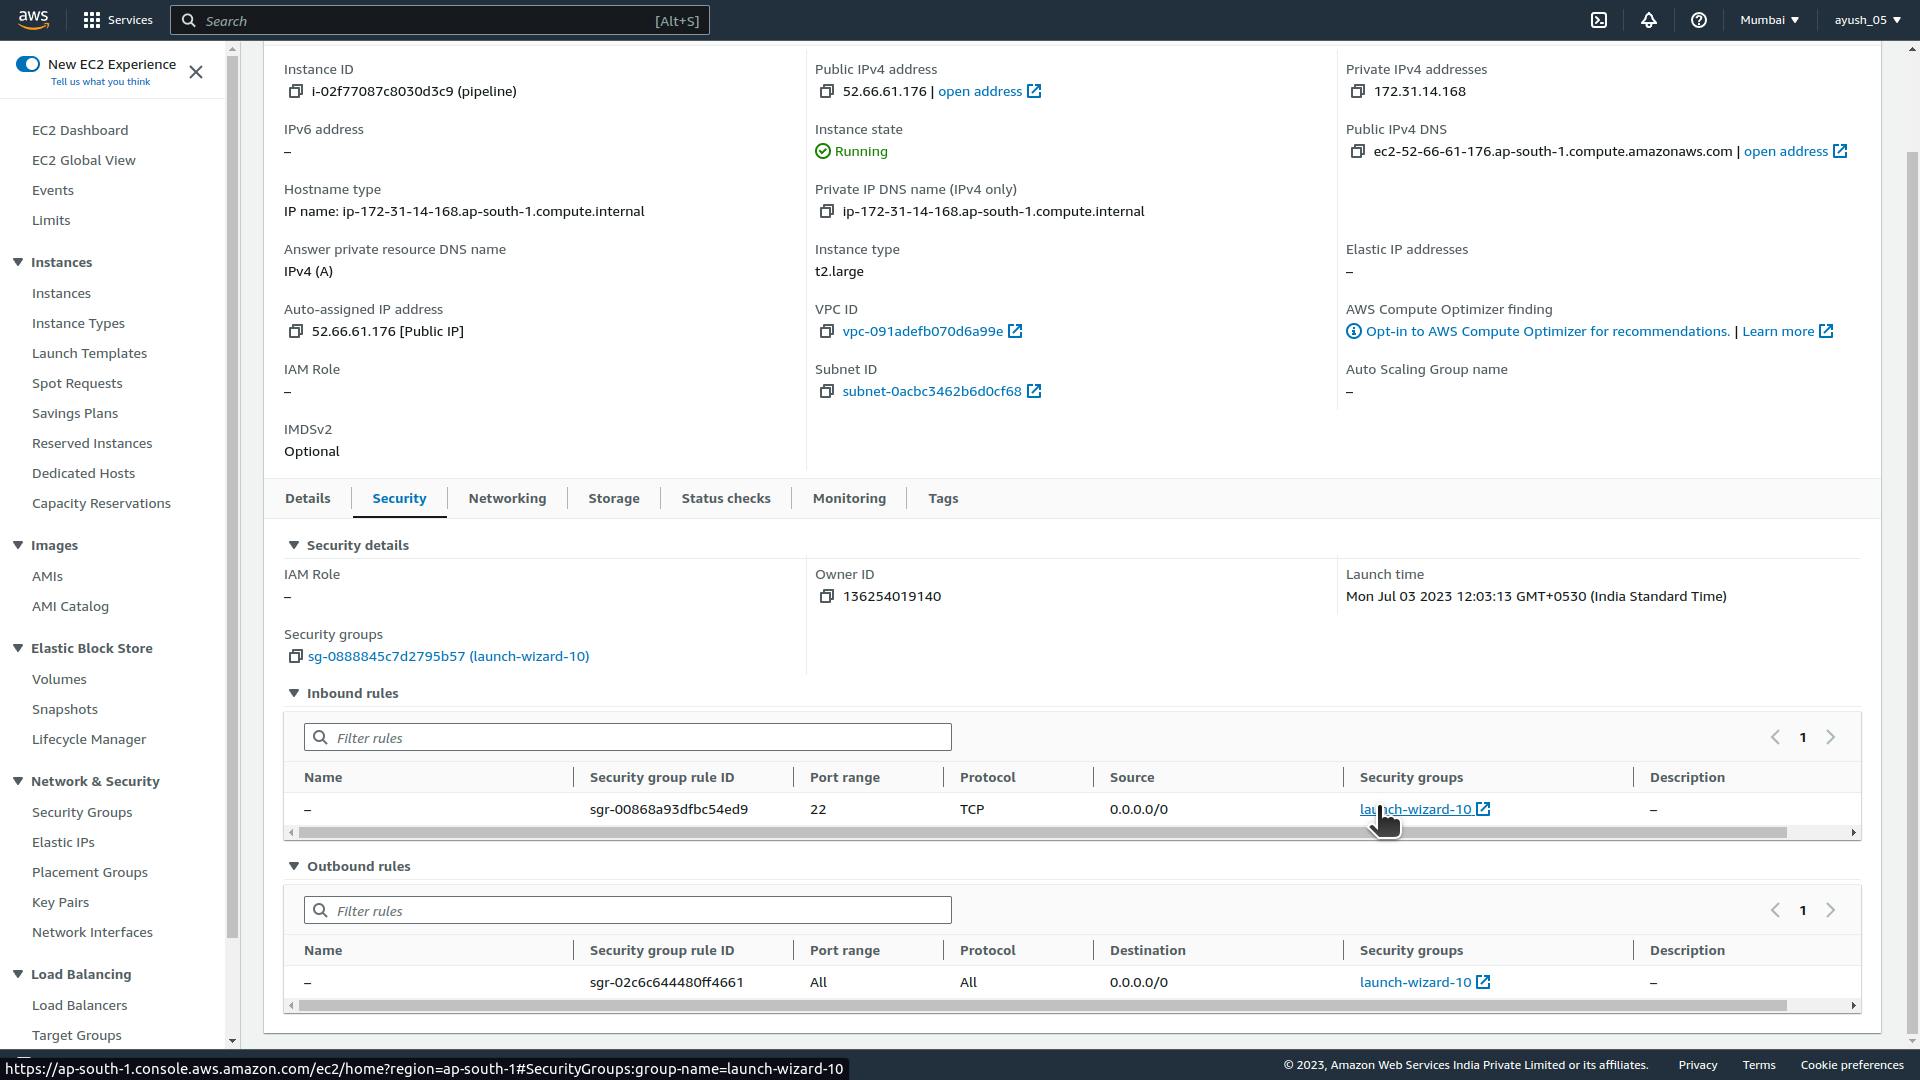
This will redirect to your new page, where you can Edit Inbound rules and can add your custom TCP rules.

Install Jenkins, SonarQube, and Docker on Instance.
Connect to Instance.
Click on connect button in your EC2 Instance summary.

Direct yourself to the directory in which your key pair file is present, then do
chmod 400 <security-key>command to ensure your key is not publicly viewable.chmod 400 <security-key>
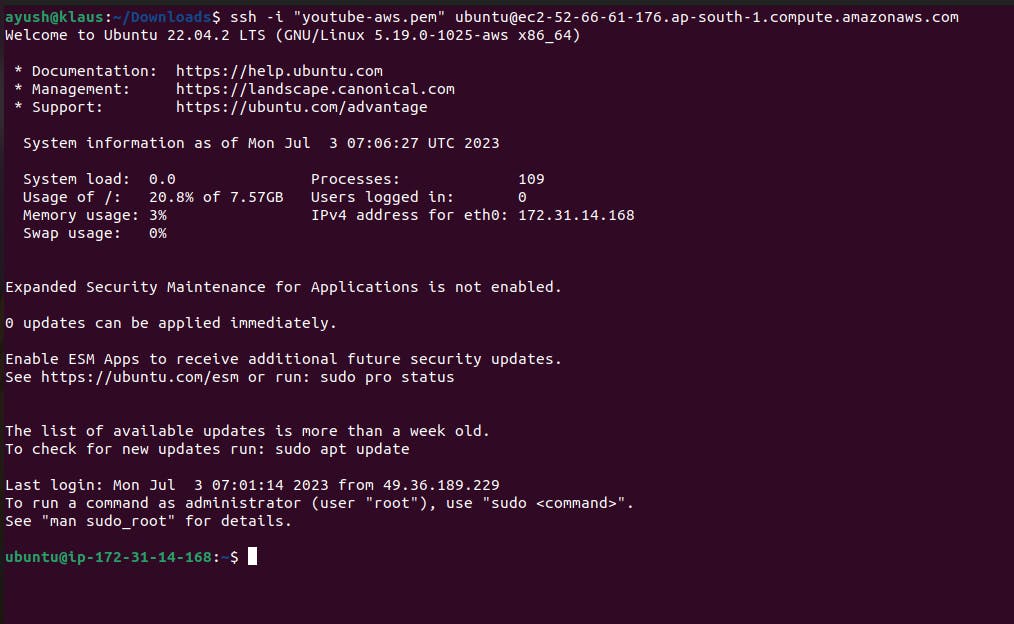
Copy this SSH command and paste it into your terminal for accessing your EC2 instance.
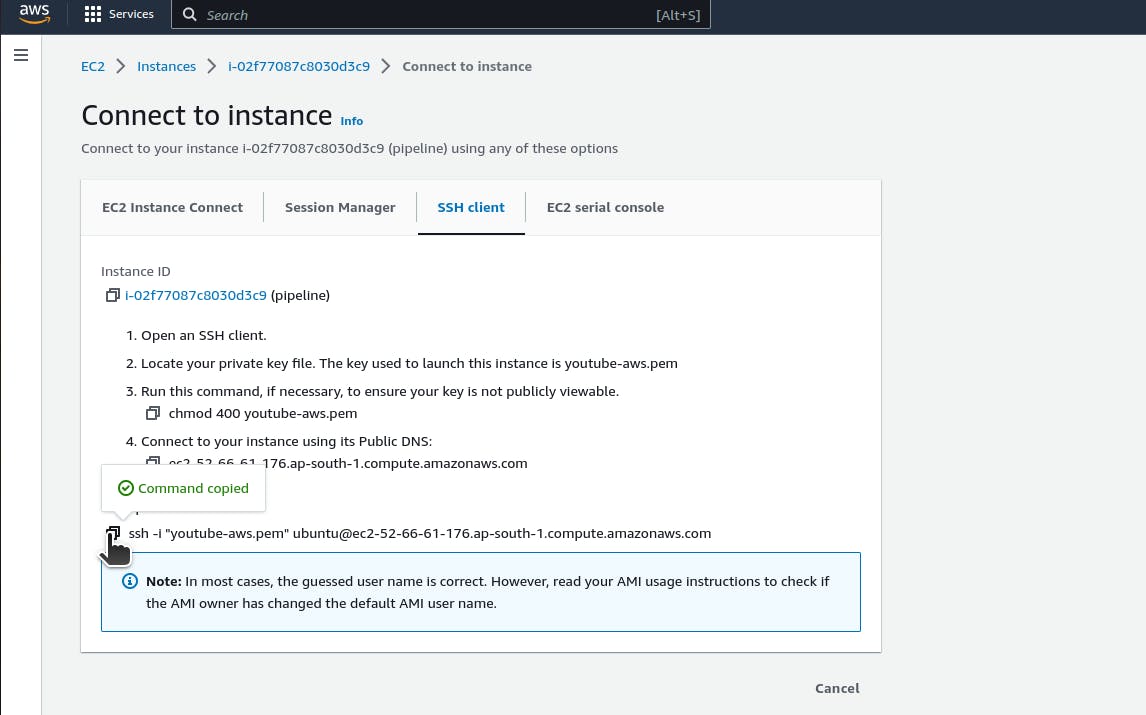
Use that copied command to connect to your instance.
Download Jenkins
Jenkins is an open-source automation server that helps automate various tasks in software development. It provides a platform for continuous integration (CI) and continuous delivery (CD), enabling teams to build, test, and deploy their applications more efficiently.
First Download Java.
To download and run Jenkins on your instance, you need to have Java Development Kit (JDK) installed. Jenkins is a Java-based application, and it requires a Java runtime environment to execute.
sudo apt update
sudo apt install openjdk-11-jre
Now install Jenkins into your instance.
curl -fsSL https://pkg.jenkins.io/debian-stable/jenkins.io-2023.key | sudo tee \
  /usr/share/keyrings/jenkins-keyring.asc > /dev/null
echo deb [signed-by=/usr/share/keyrings/jenkins-keyring.asc] \
  https://pkg.jenkins.io/debian-stable binary/ | sudo tee \
  /etc/apt/sources.list.d/jenkins.list > /dev/null
sudo apt-get update
sudo apt-get install jenkins
Now to check the status of your Jenkins services you can run
sudo systemctl status jenkins
You can access your Jenkins application on a web browser by using the public IPv4 address of the instance and putting port 8080 after it.

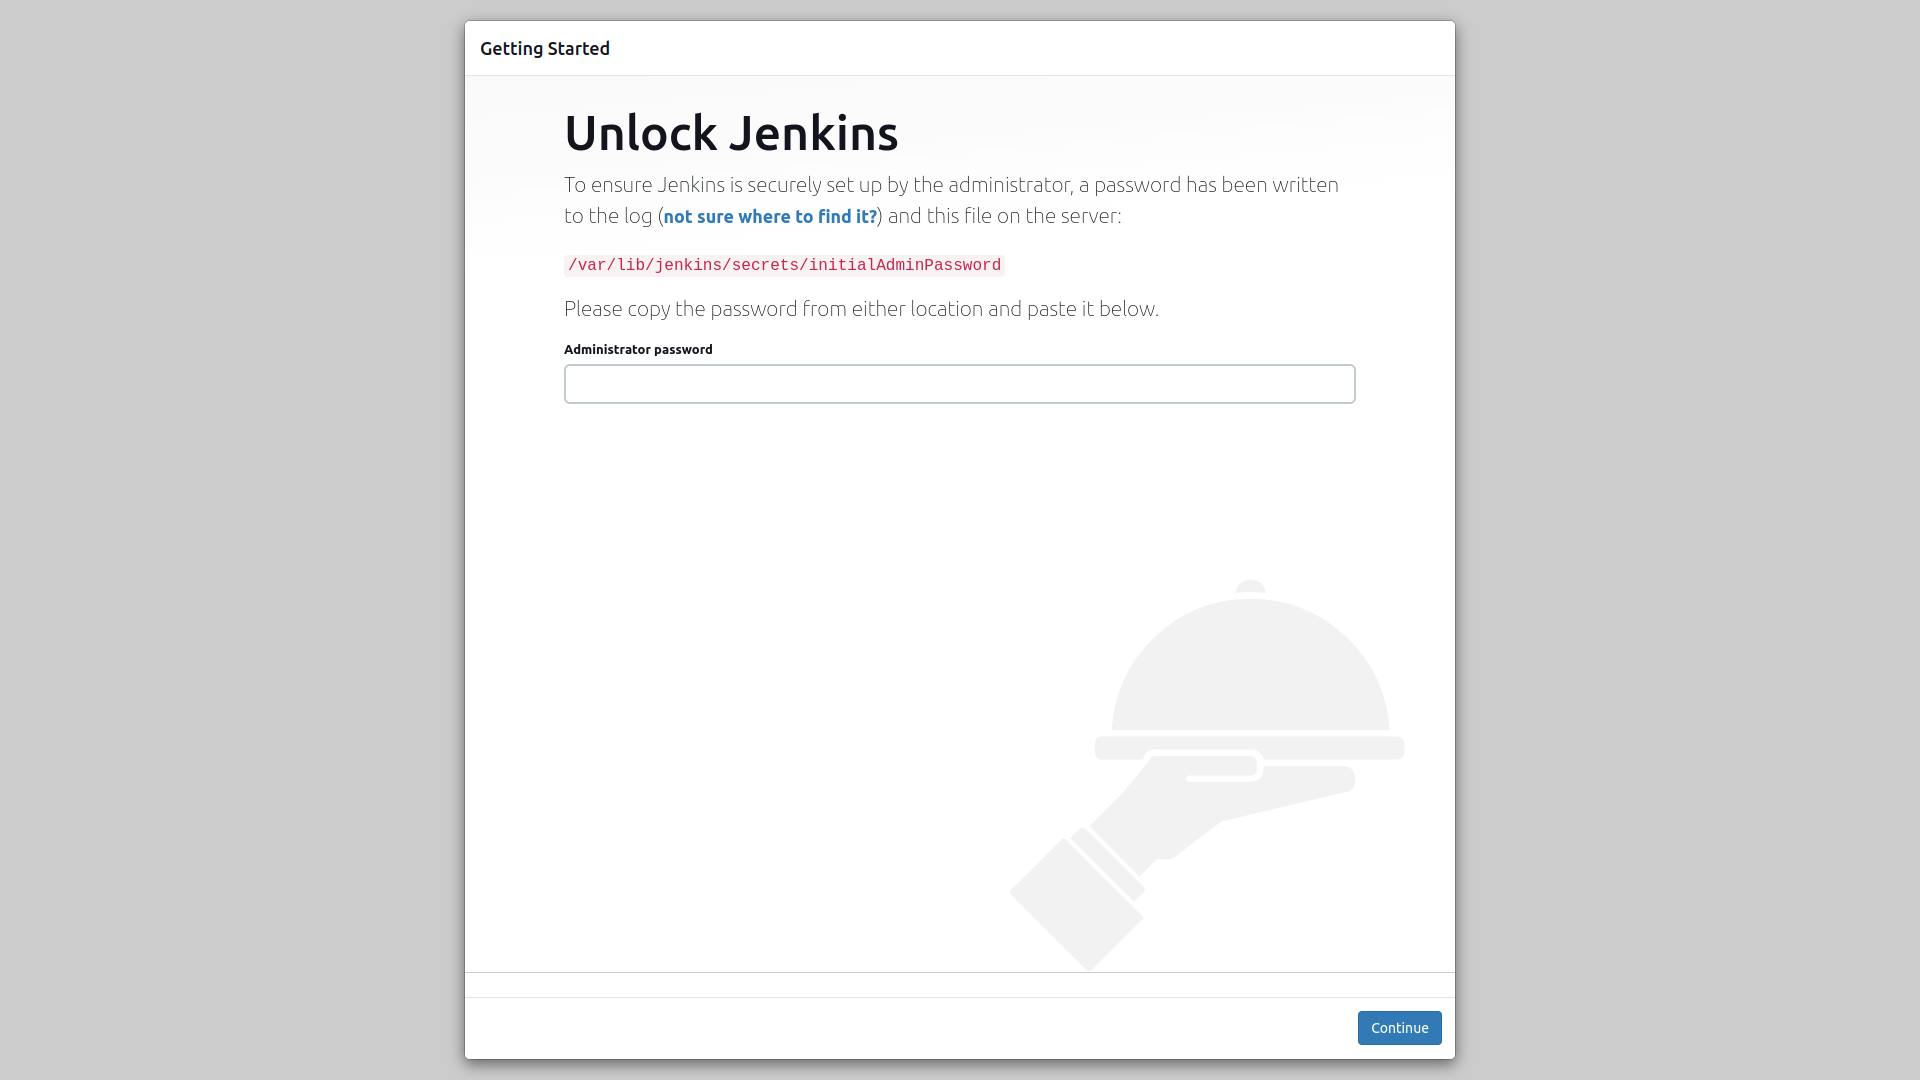
To Unlock jenkins you first need to have an Administrator password, which you can get by running
sudo cat /var/lib/jenkins/secrets/initialAdminPassword
After this put administrator password and click on Install suggested plugins.

Download SonarQube
SonarQube is a code quality management platform that helps analyze and monitor the quality of your source code. It scans your codebase, identifies issues, and provides detailed reports on code vulnerabilities, bugs, code smells, and code duplication.
First, go to the root user to add a new user.
sudo su -
adduser sonarqube


Then download the unzip package
sudo apt install unzip
After downloading unzip package, move to sonarqube user.
sudo su - sonarqube

Now in Sonarqube user give the command to download the sonarQube binary.
wget https://binaries.sonarsource.com/Distribution/sonarqube/sonarqube-9.4.0.54424.zip
Now your SonarQube binary is downloaded, now unzip it
unzip *
Now give the command to modify permissions.
chmod -R 755 /home/sonarqube/sonarqube-9.4.0.54424
chown -R sonarqube:sonarqube /home/sonarqube/sonarqube-9.4.0.54424

Now go into the SonarQube folder and start the SonarQube server.
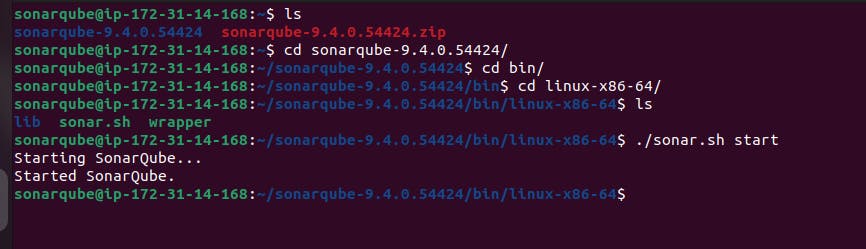
Now your SonarQube server will be running on your port 9000.
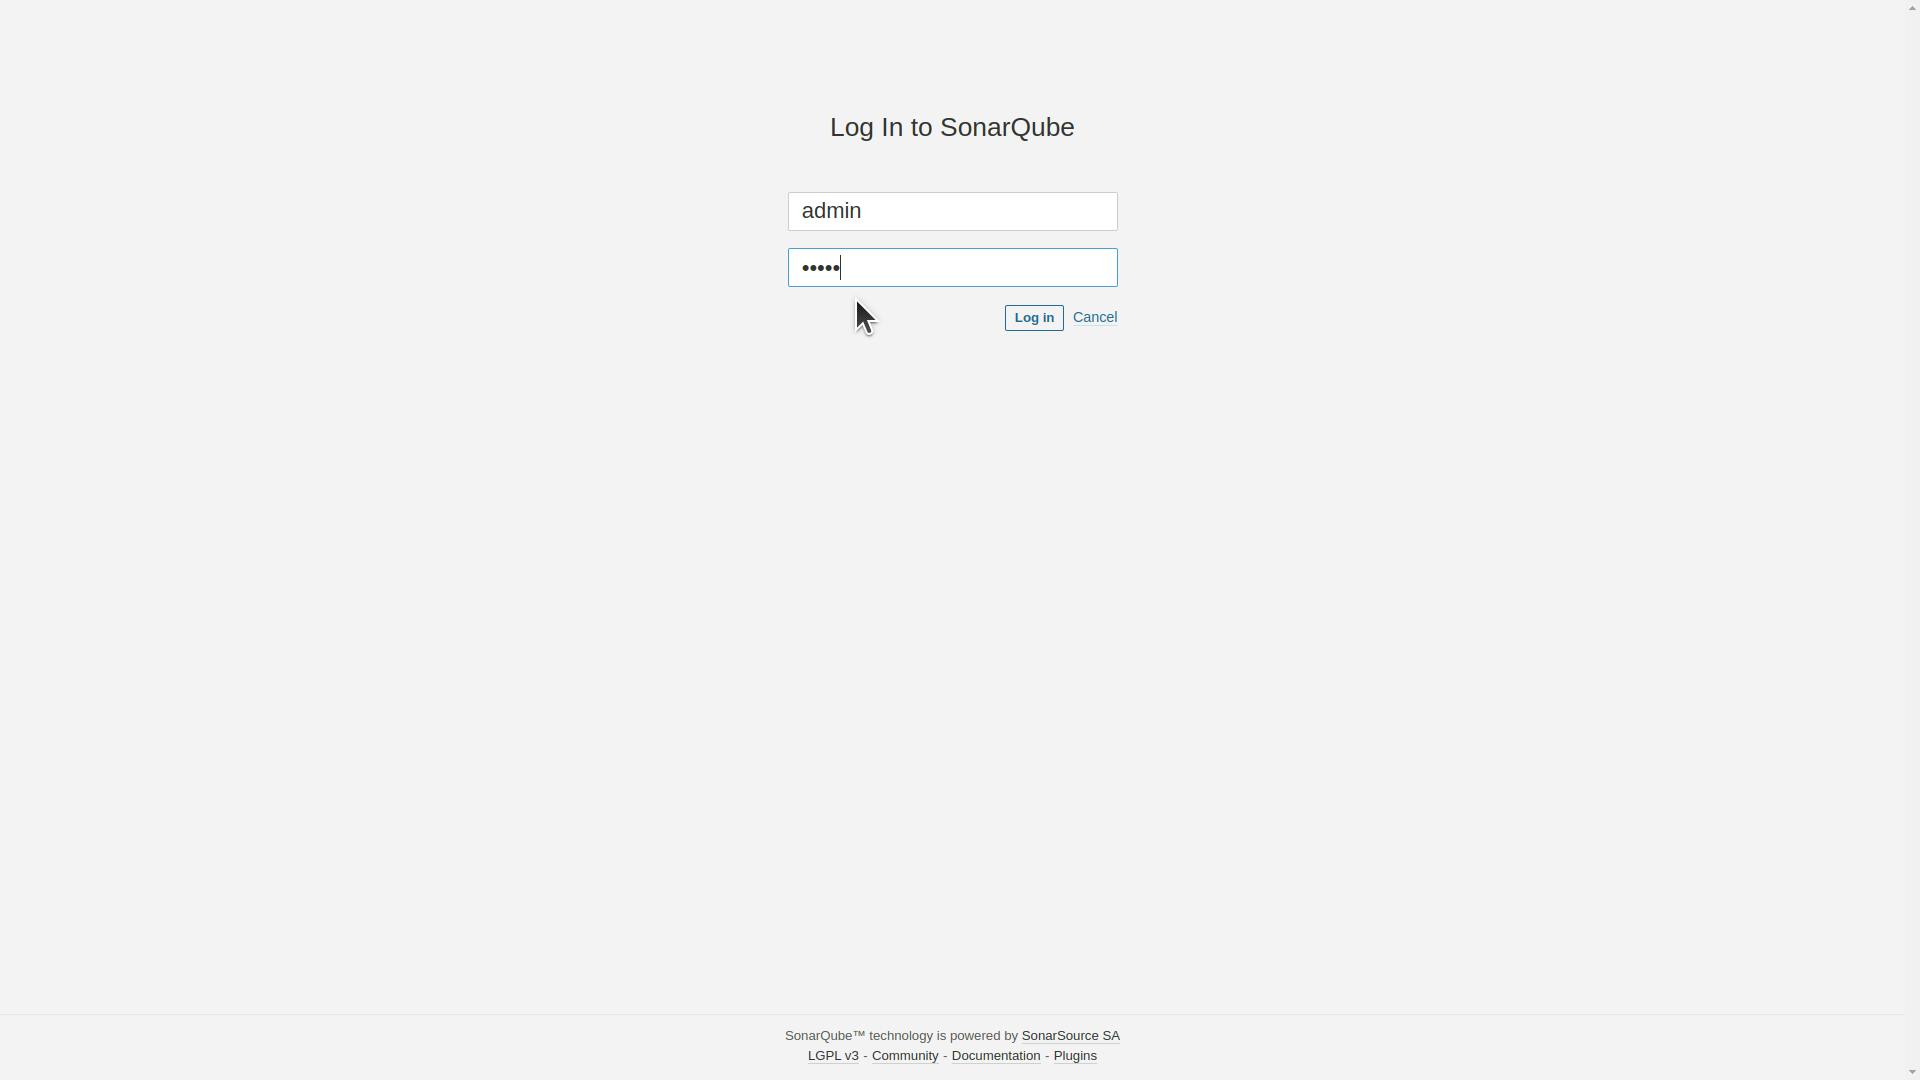
You can access your SnarQube server on a web browser by using the public IPv4 address of instance and putting the port 9000 number after it.

By default the username and password are admin
Download Docker
Docker is a platform that allows you to package and distribute applications as lightweight, portable containers. These containers encapsulate all the necessary components, including the application code, runtime environment, libraries, and dependencies.
Go to the root user.
sudo su -
Now run the docker install command on the root user.
sudo apt install docker.io

Grant Jenkins user and Ubuntu user permission to Docker Deamon in root user.
usermod -aG docker jenkins
usermod -aG docker ubuntu
systemctl restart docker

Connect & Authenticate Sonarqube & Docker to Jenkins.
Install plugins.
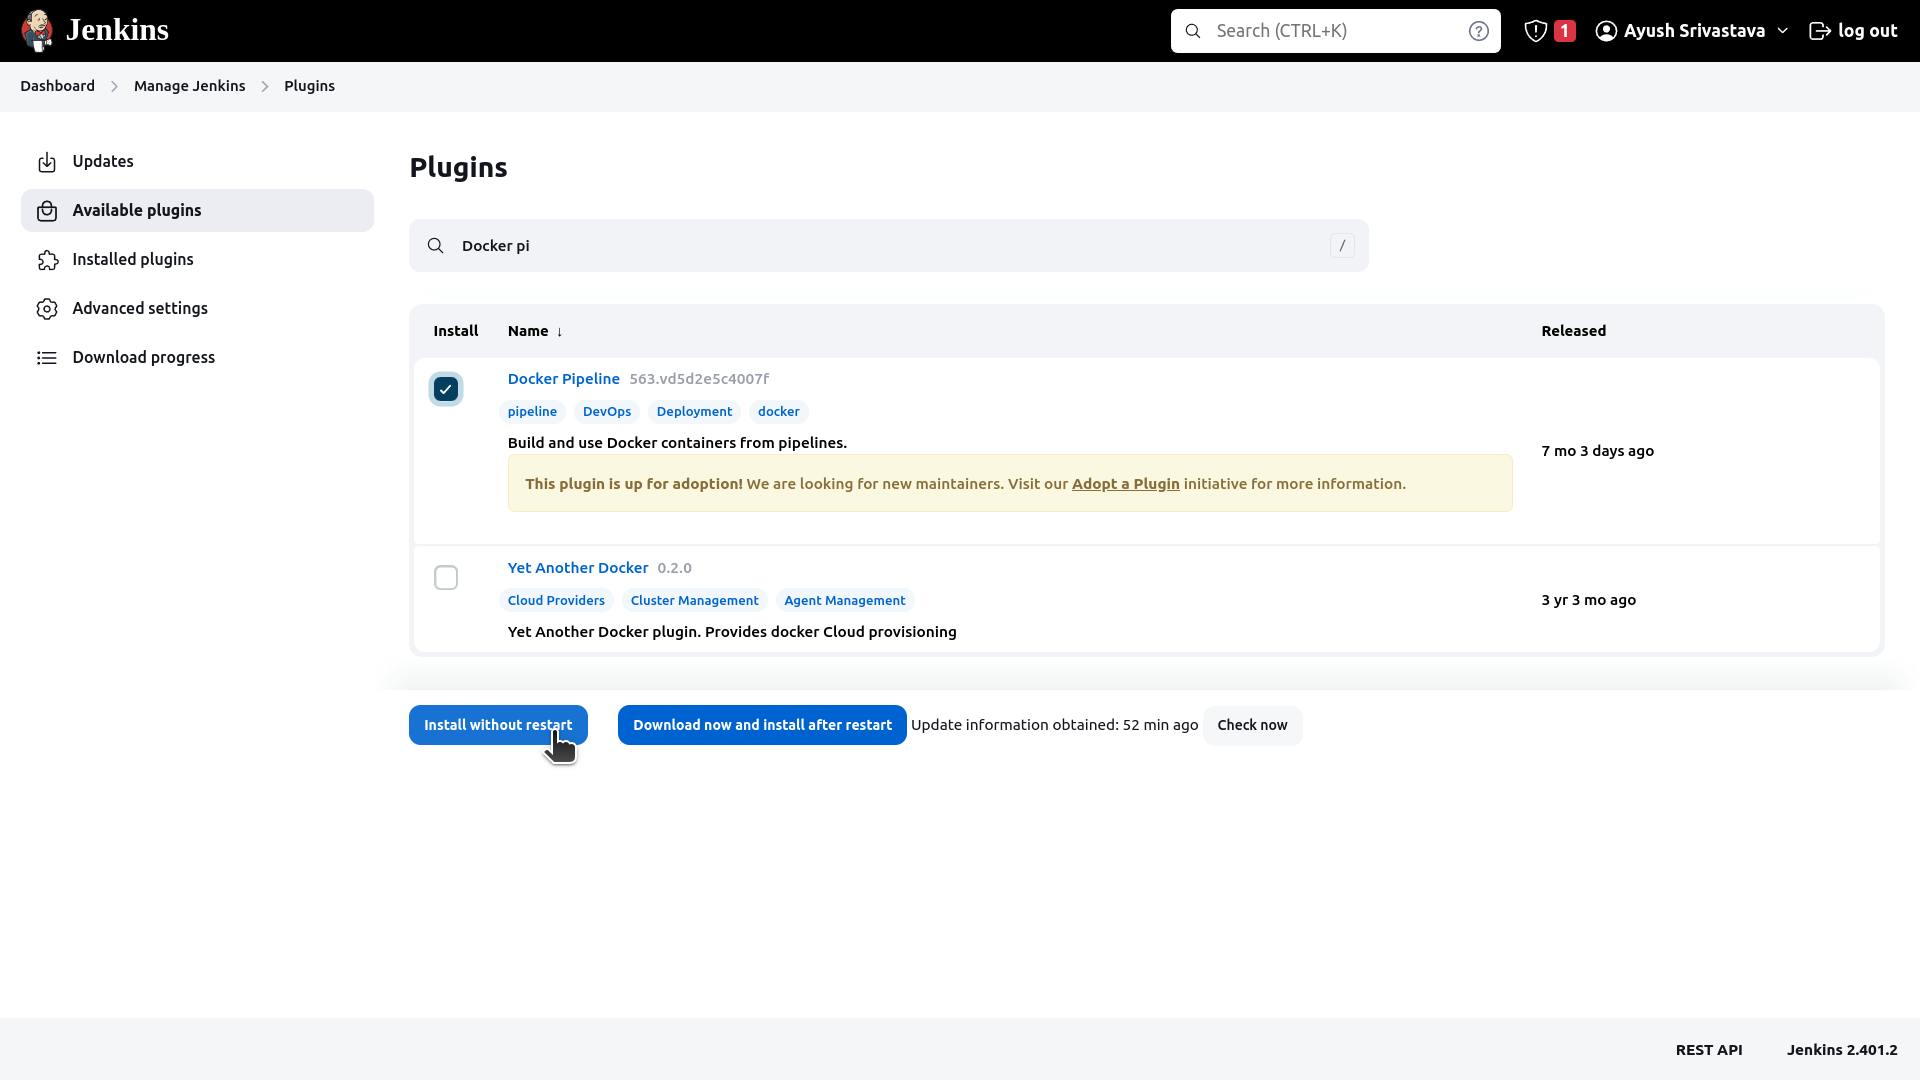
Install Docker Plugins
Go to the dashboard and click on Manage Jenkins.
Click on Plugins.
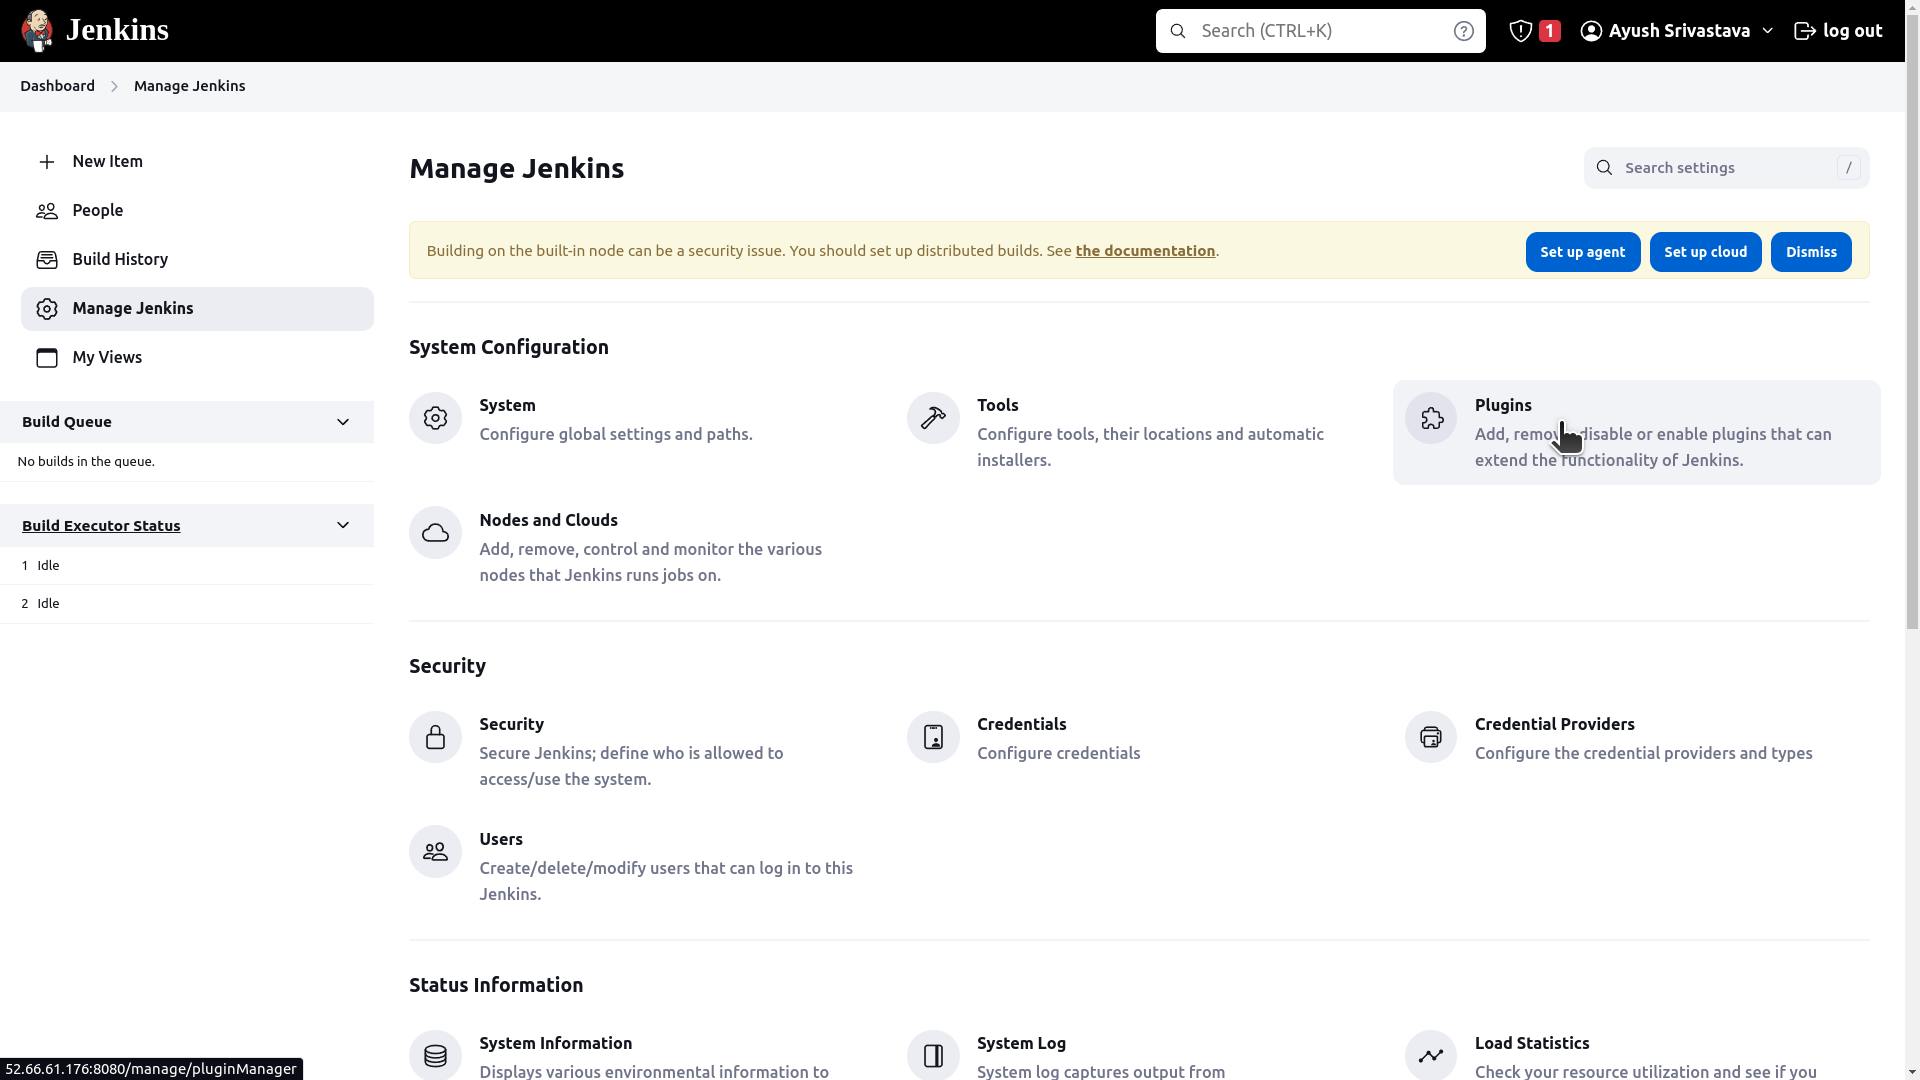
Go to available plugins and search for Docker Pipeline and install it.
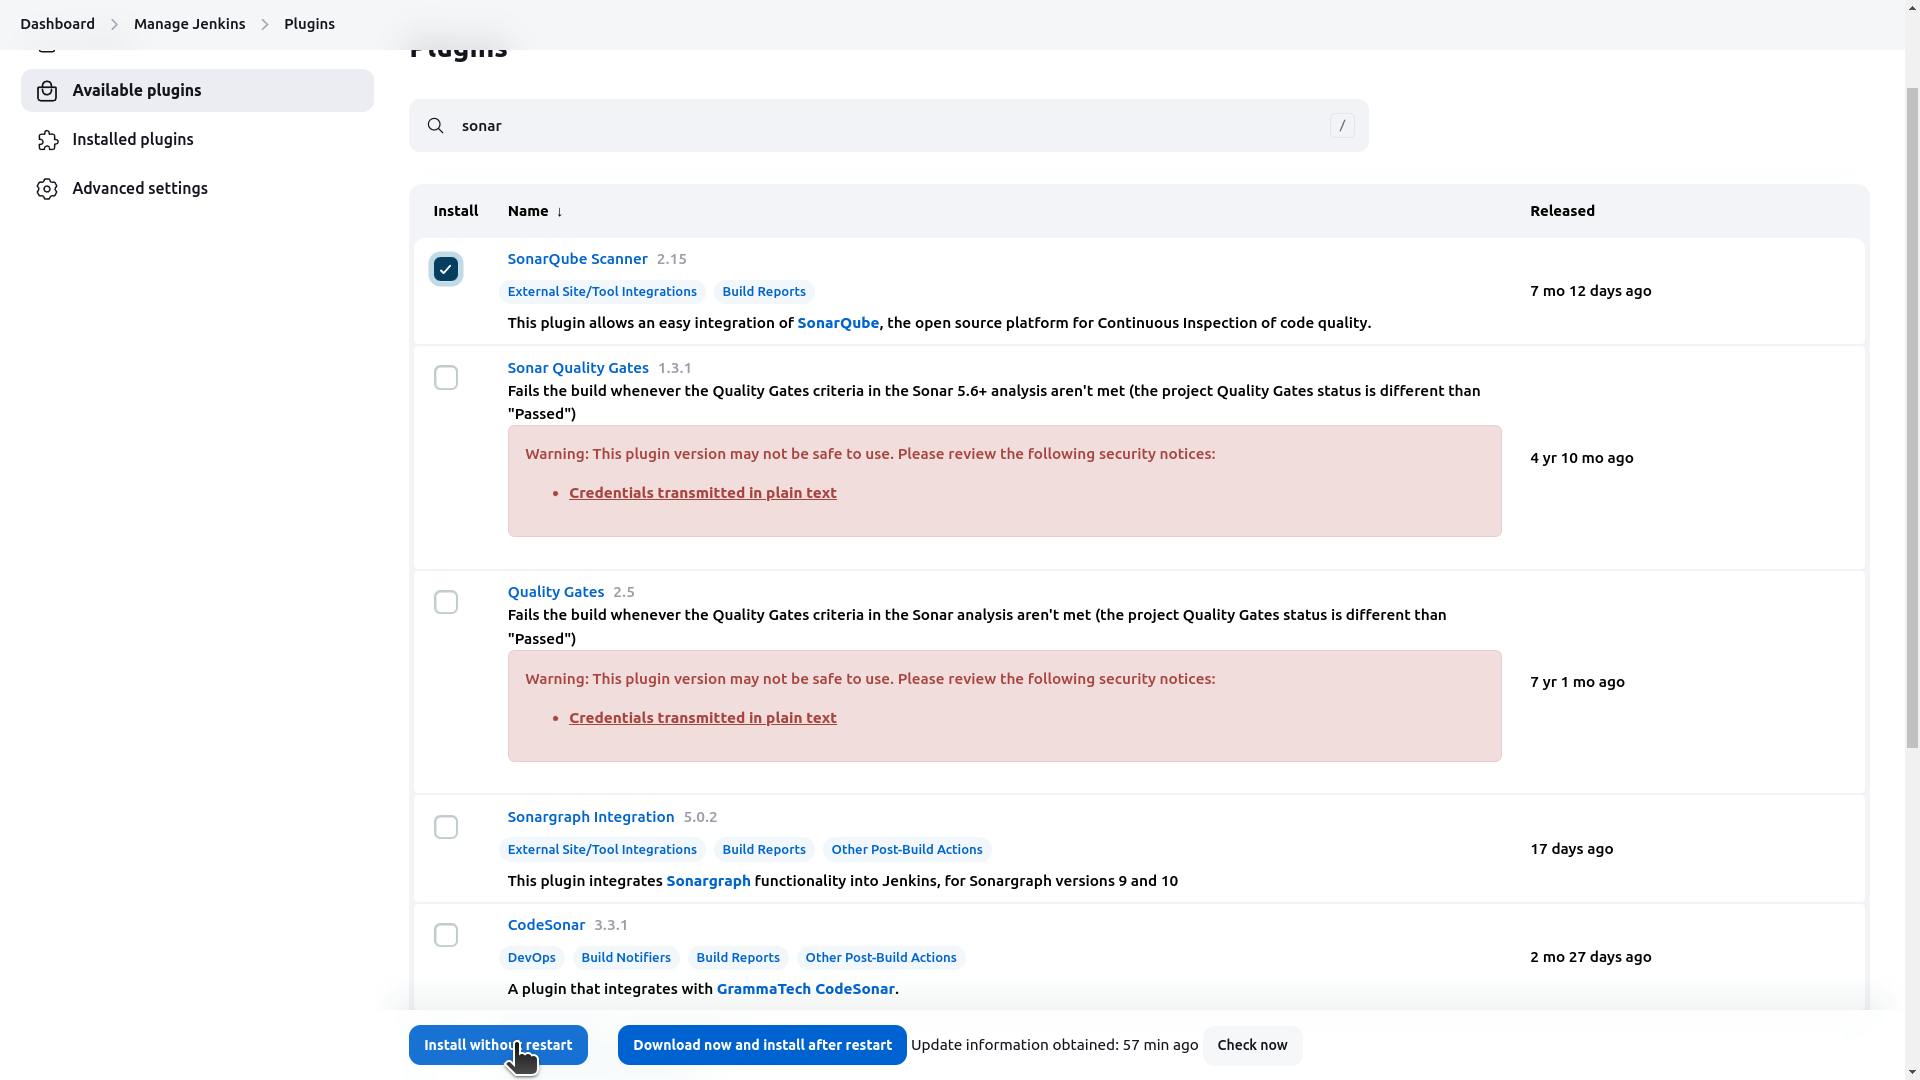
Install SonarQube Plugin
Go to the dashboard, click on Manage Jenkins, click on Plugins, go to available and Install SonarQube Scanner.
Adding Sonarqube credentials to Jenkins
Go to SonarQube, click on My Account, click on Security

Now go to Generate Token and create a Token and copy it.

Now go back to the Jenkins server, go to Manage Jenkins and click on Credentials.
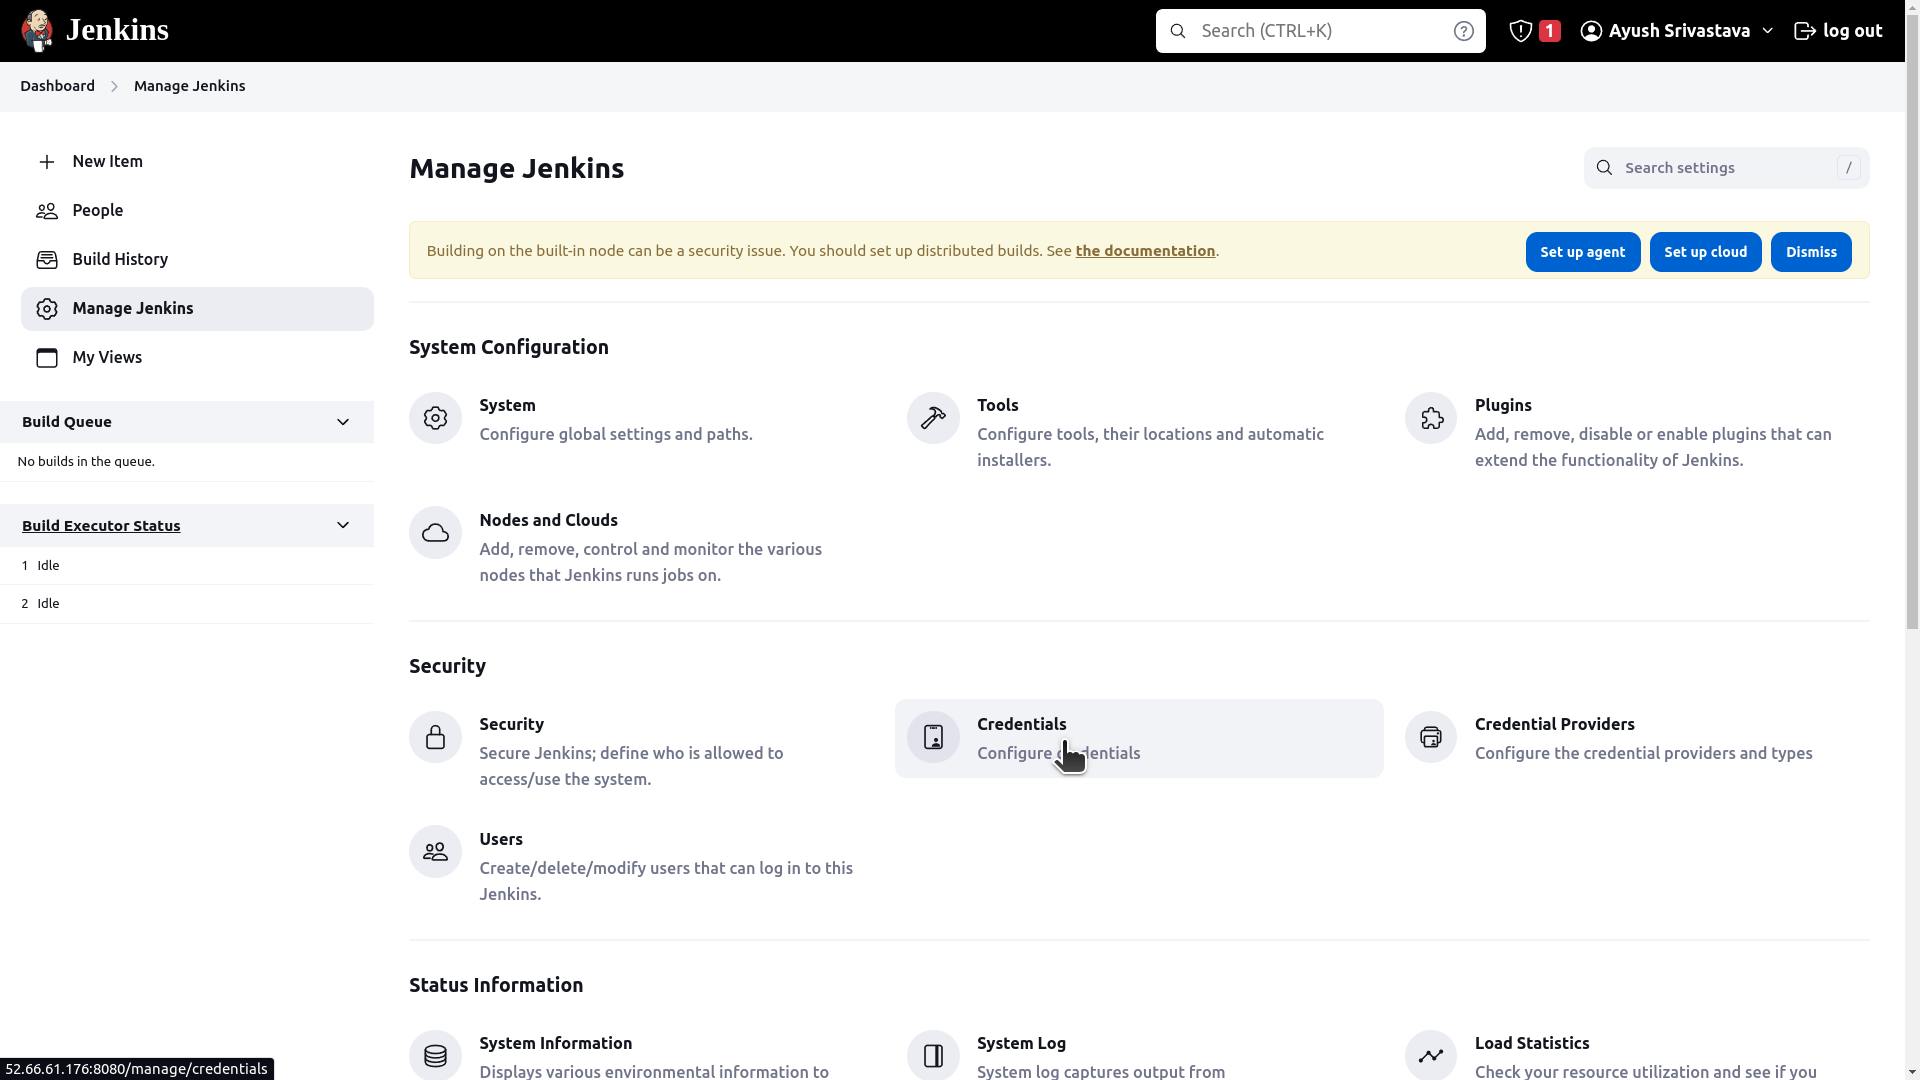
Go to the system.

Go to Global credentials.

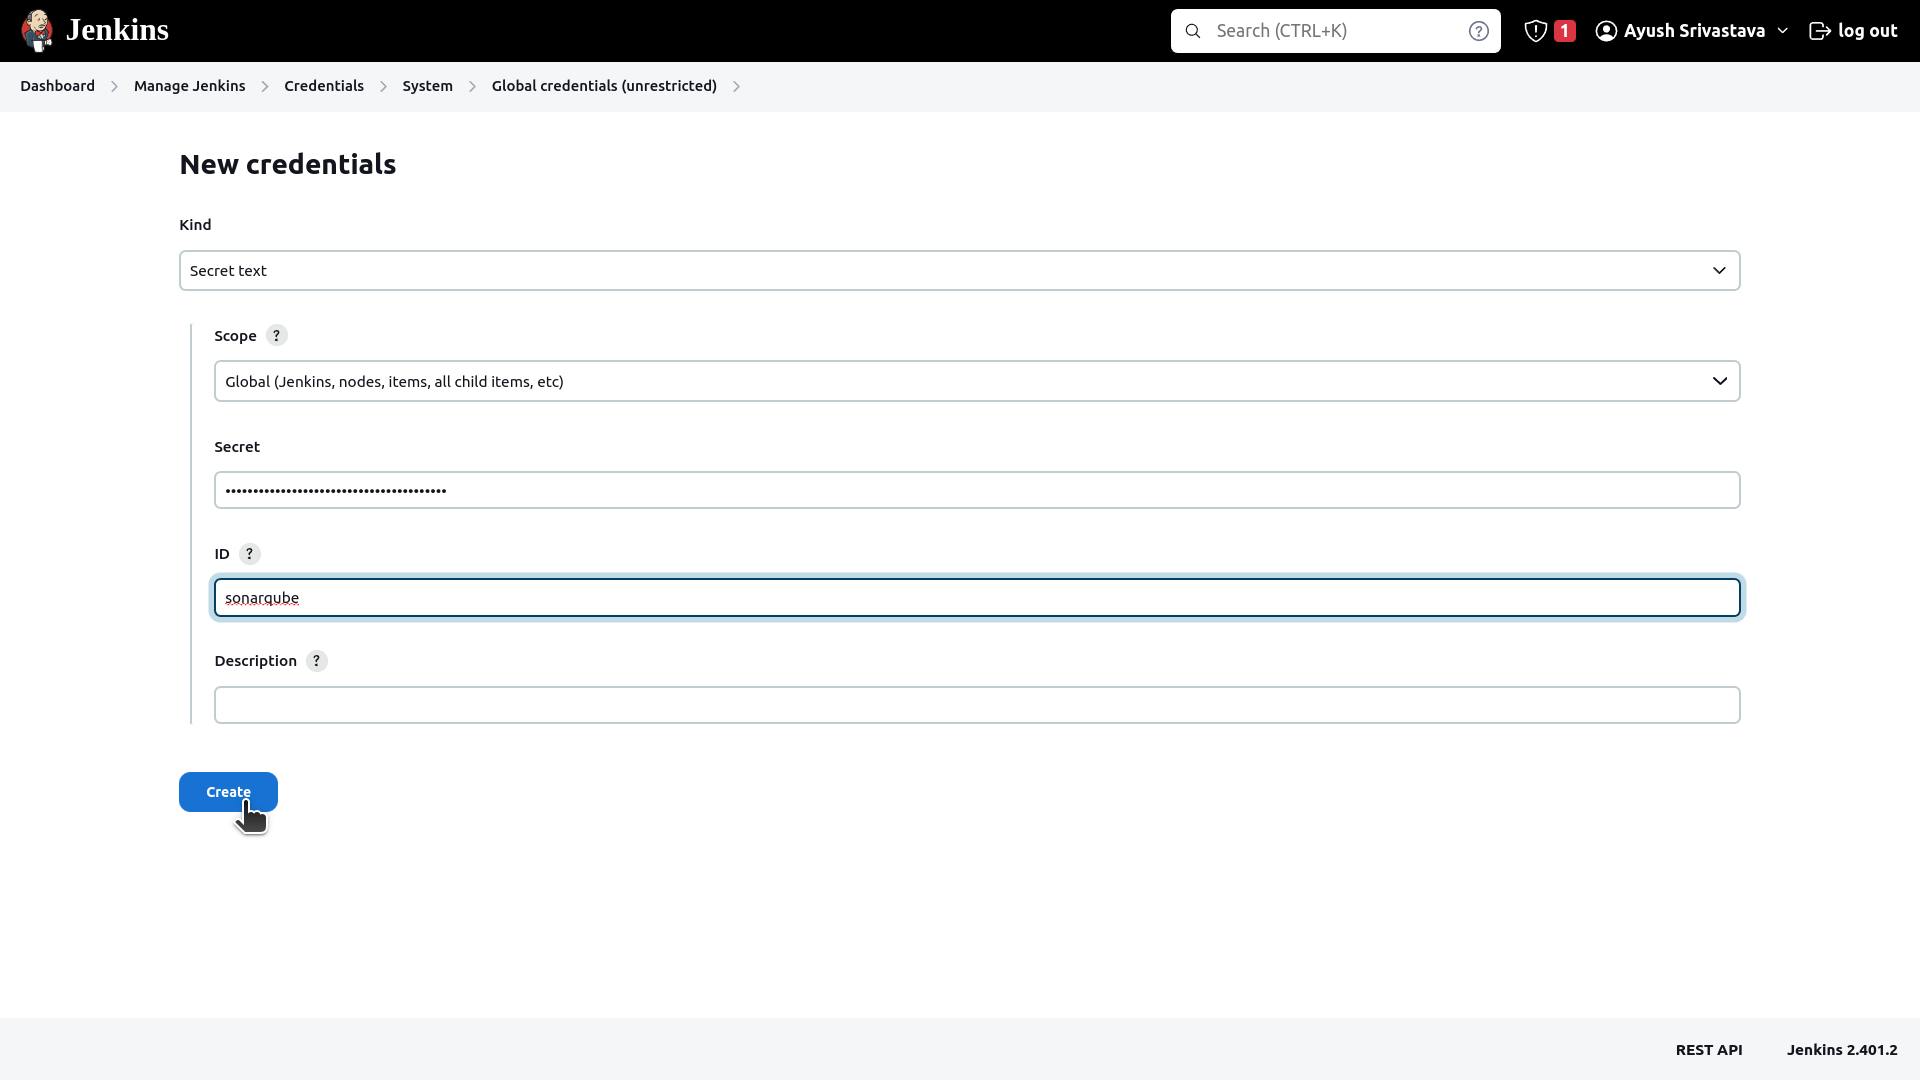
Now click on Add Credentials.

Add Token generated from SonarQube into secret text form, Give it an ID name which will be further used in Jenkinsfile to connect with your SonarQube server
Adding Docker credentials to Jenkins
Go to the Jenkins server, go to Manage Jenkins and click on Credentials.

Go to the system.

Go to Global credentials.

Now click on Add Credentials.

Change the Credentials type to Secret text and add your DockerHub password into the secret text form, Give it an ID name which will be further used in Jenkinsfile to connect with your DockerHub.

Connect tools and servers in your Jenkins.
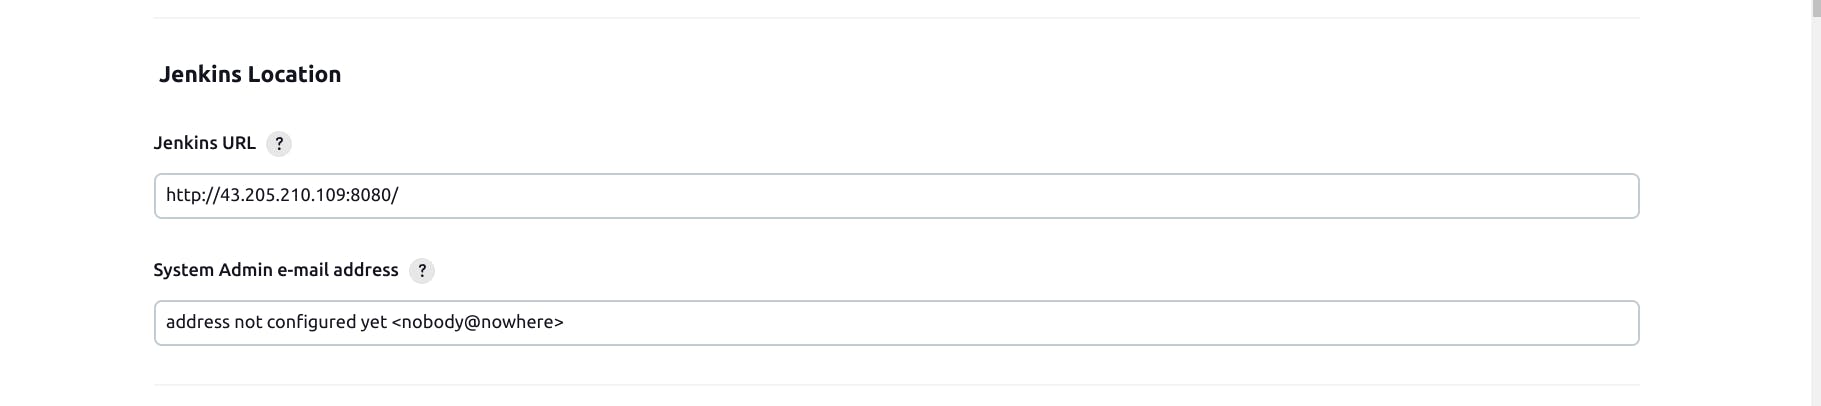
Go to Manage Jenkins ->Global Configuration, then add SonraQube and Jenkins URL into it.
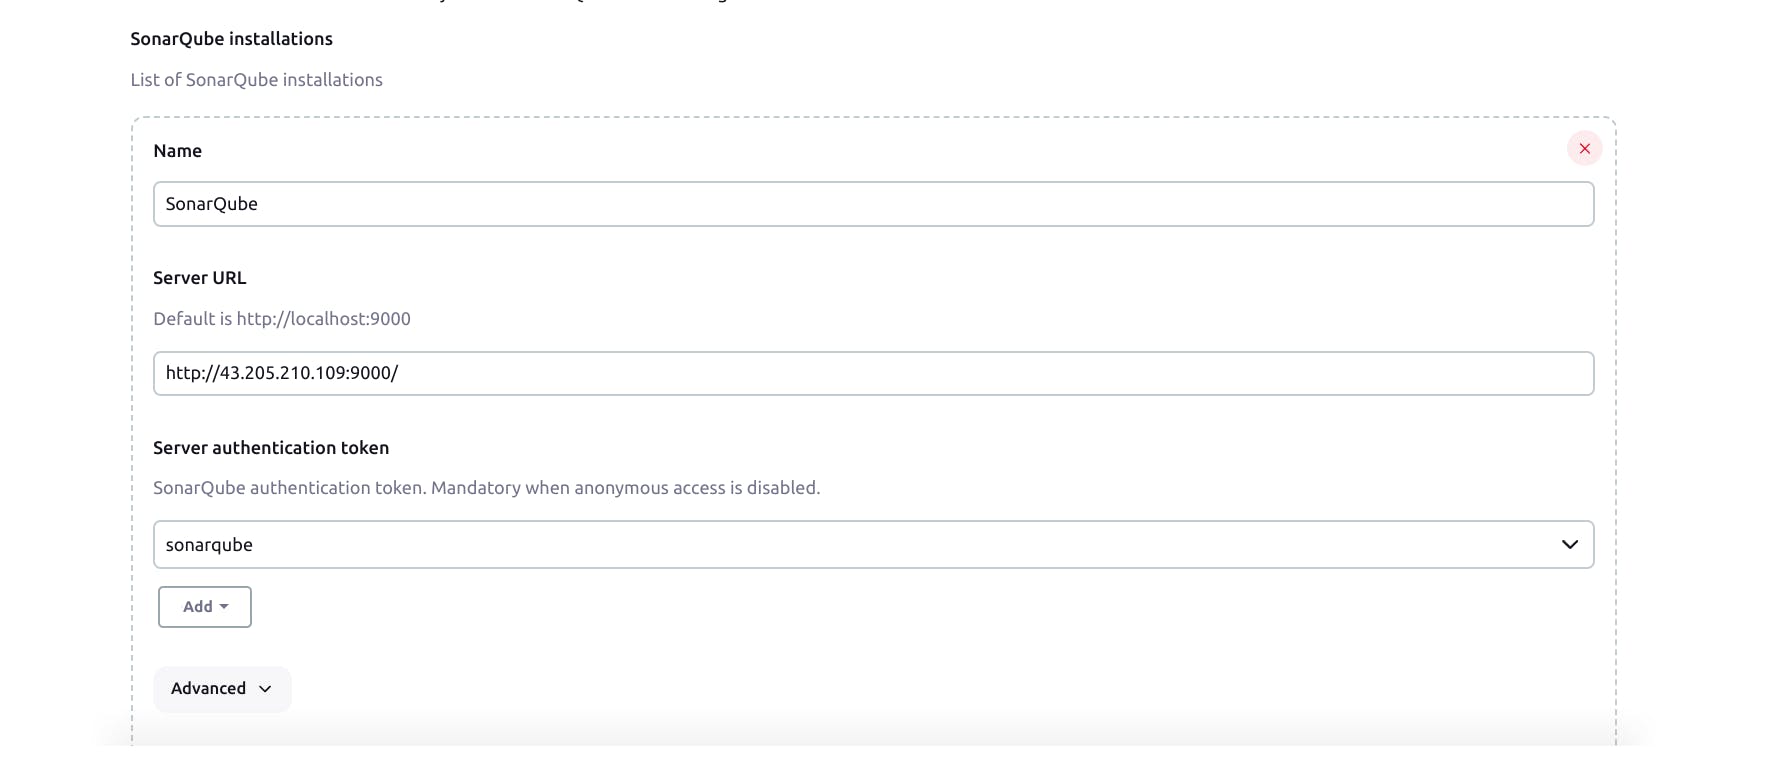
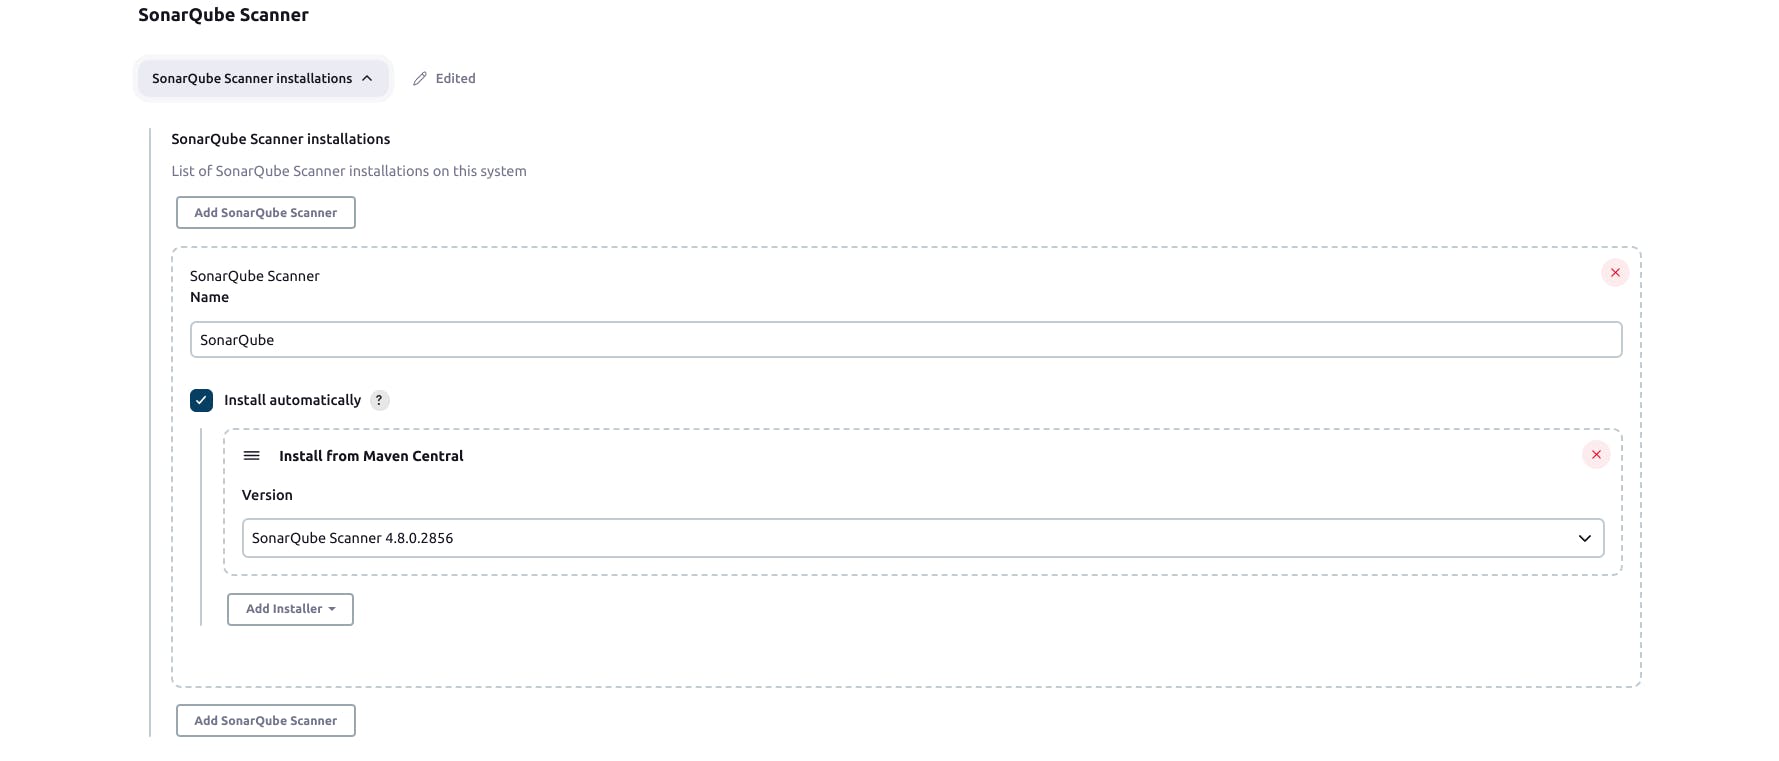
Go to Manage Jenkins -> configure Tools and then add SonarQube Scanner into it.
Setup Continuous Integration for your Web Application
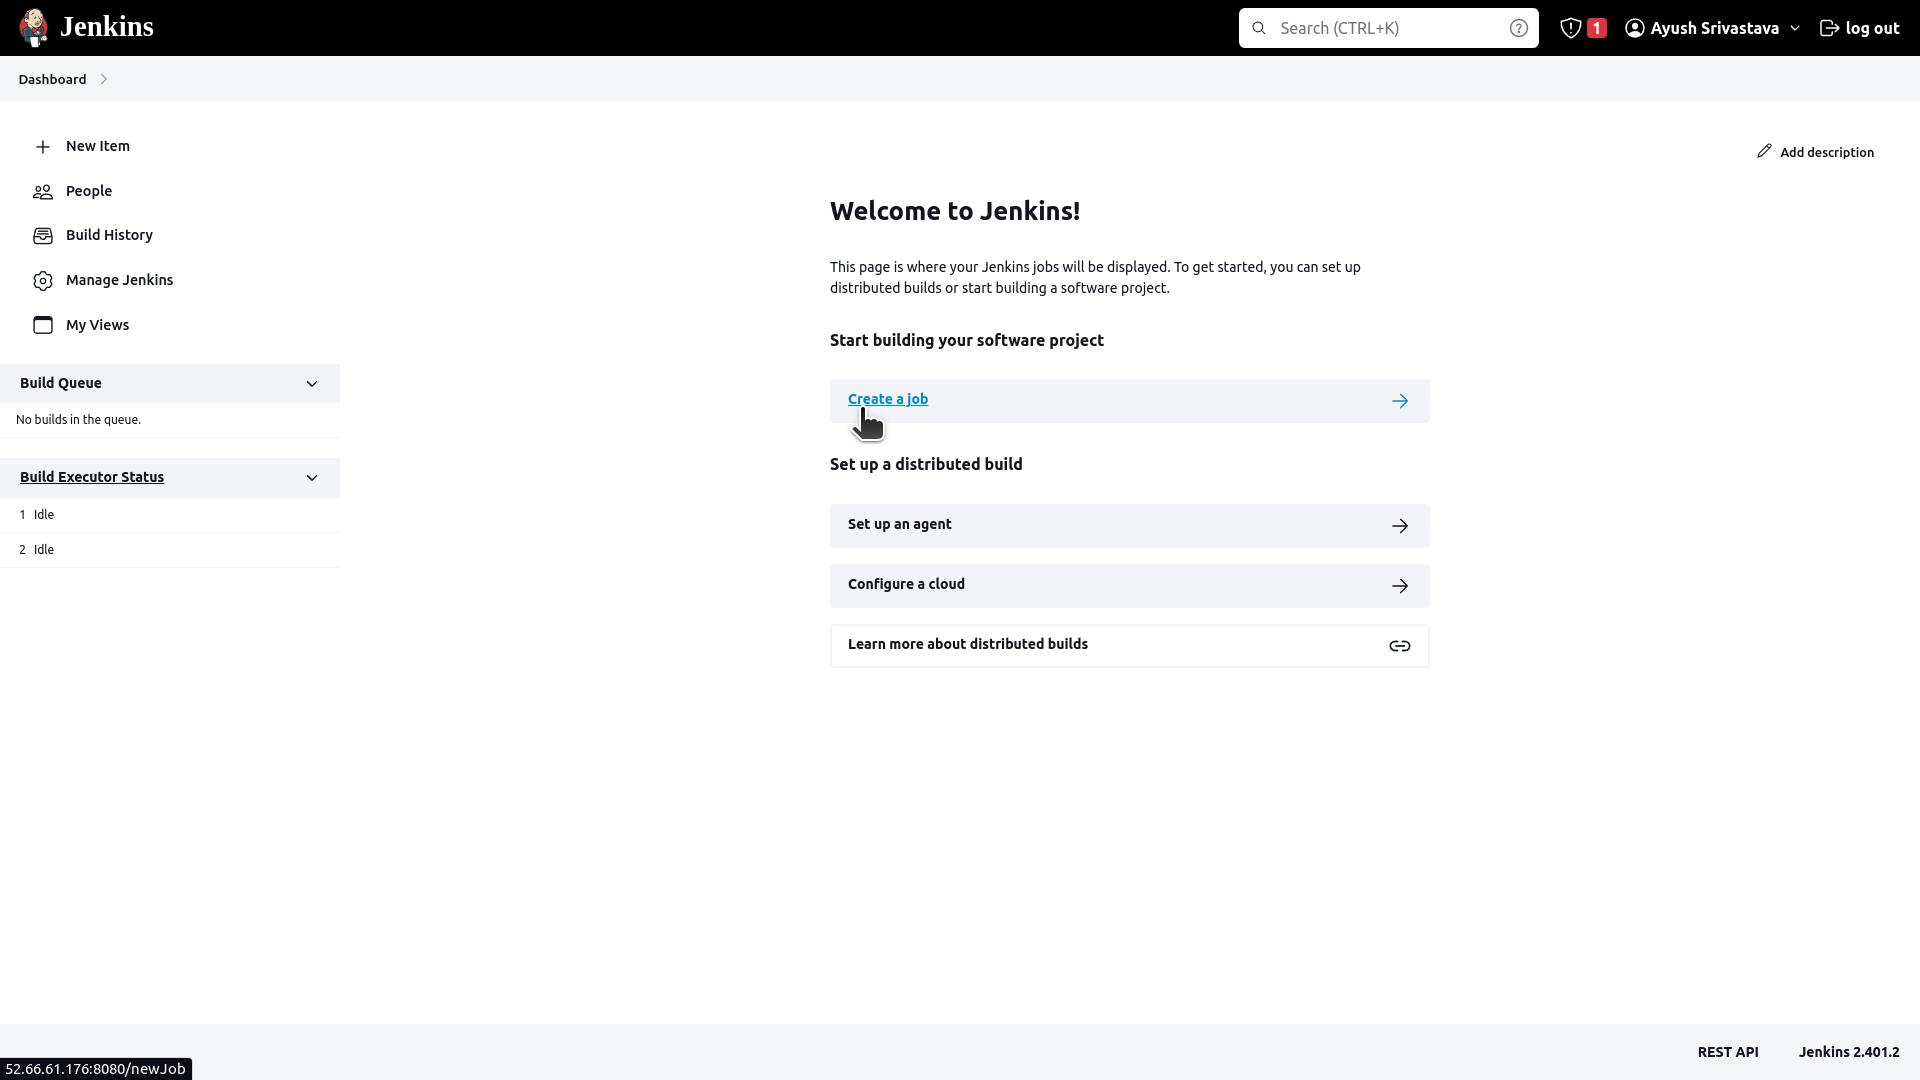
Create a Job.
Create a Job.
Select an item name, select Pipeline and click on OK.

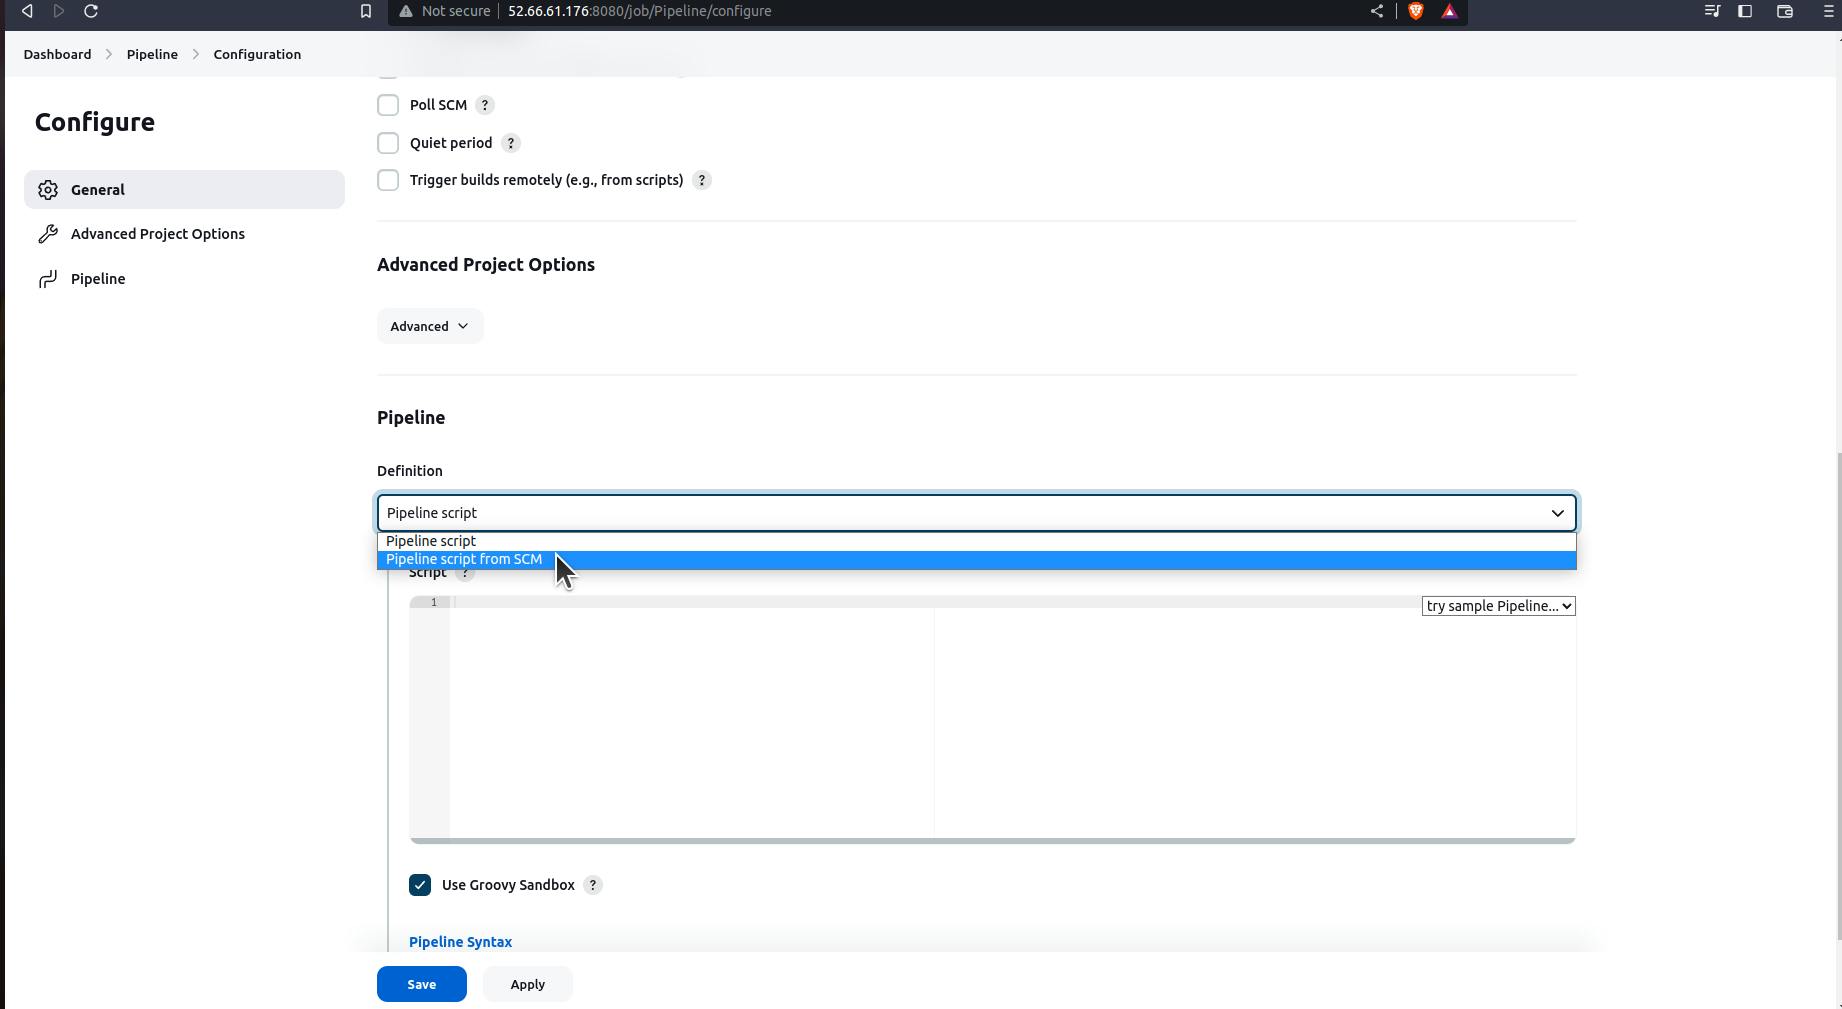
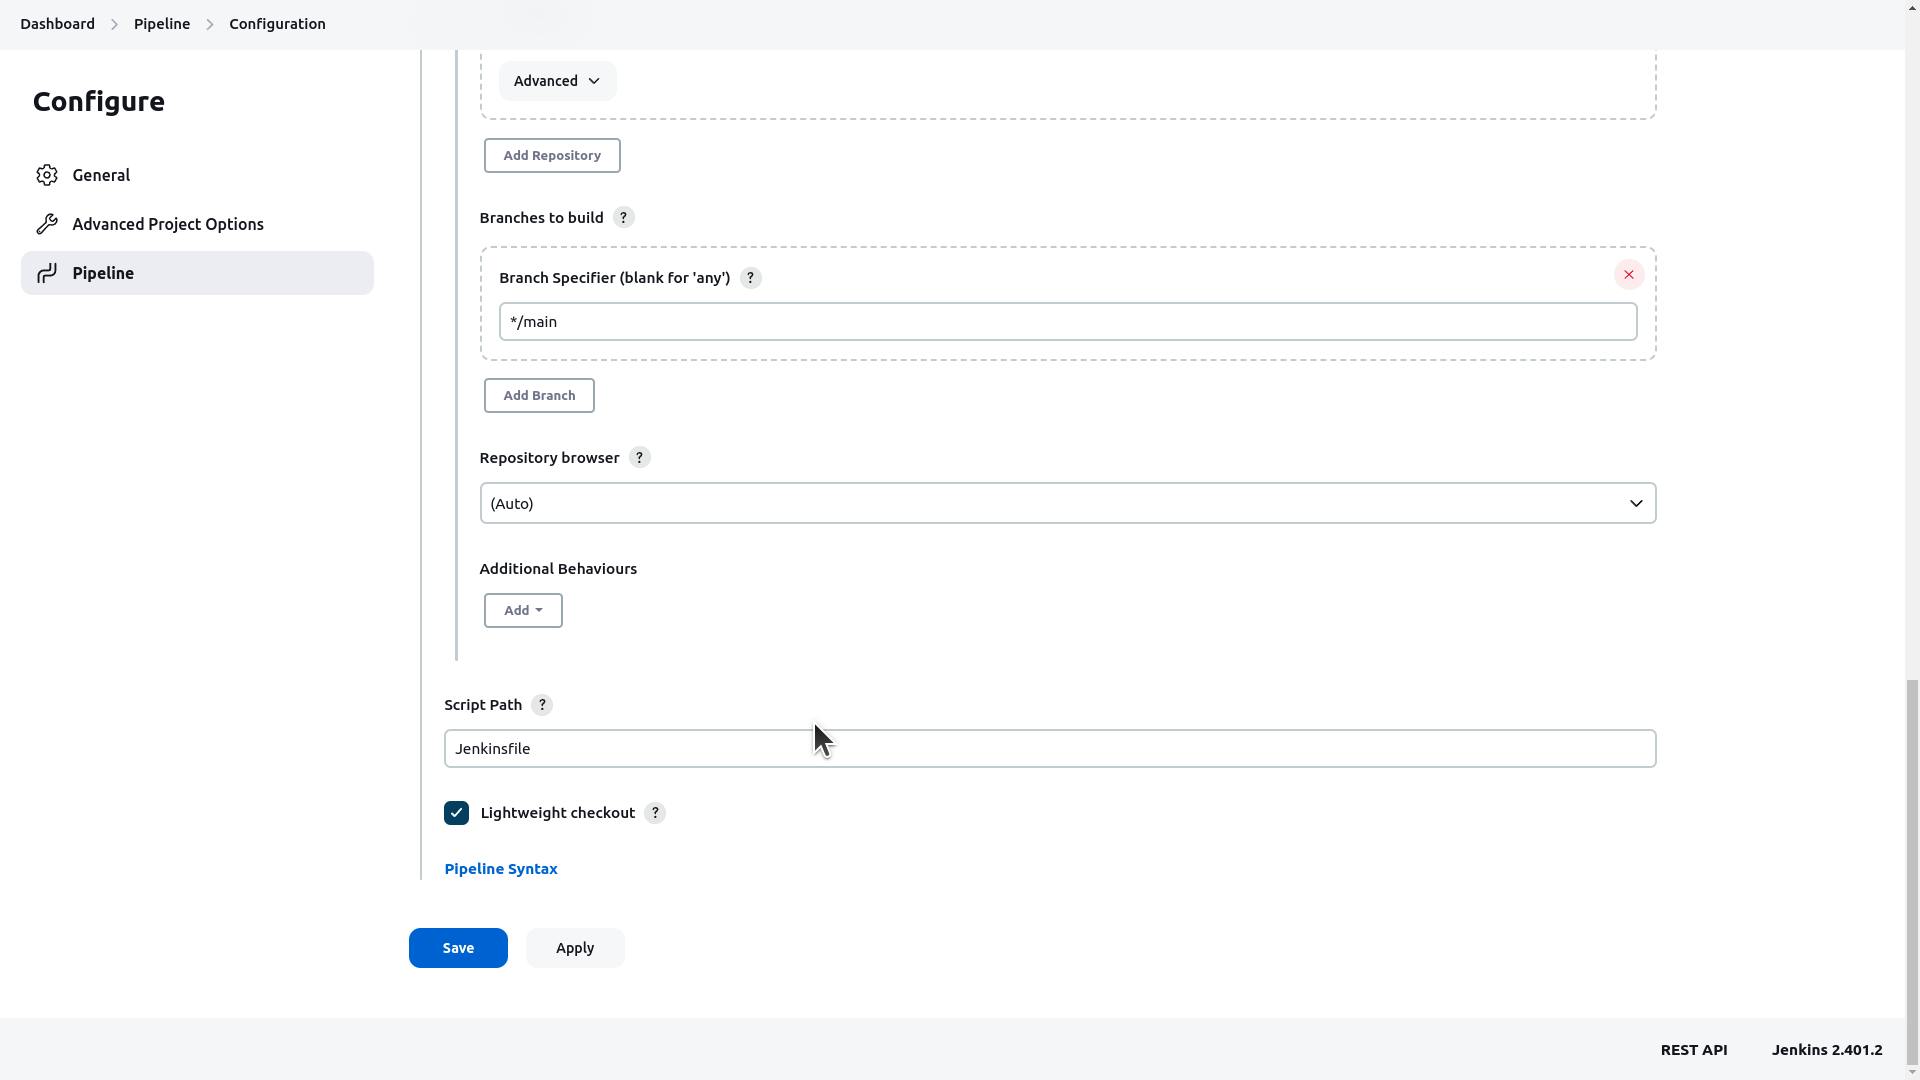
Now go to the Pipeline option and select Pipeline script from SCM.
Then connect to your GitHub repository of the project.
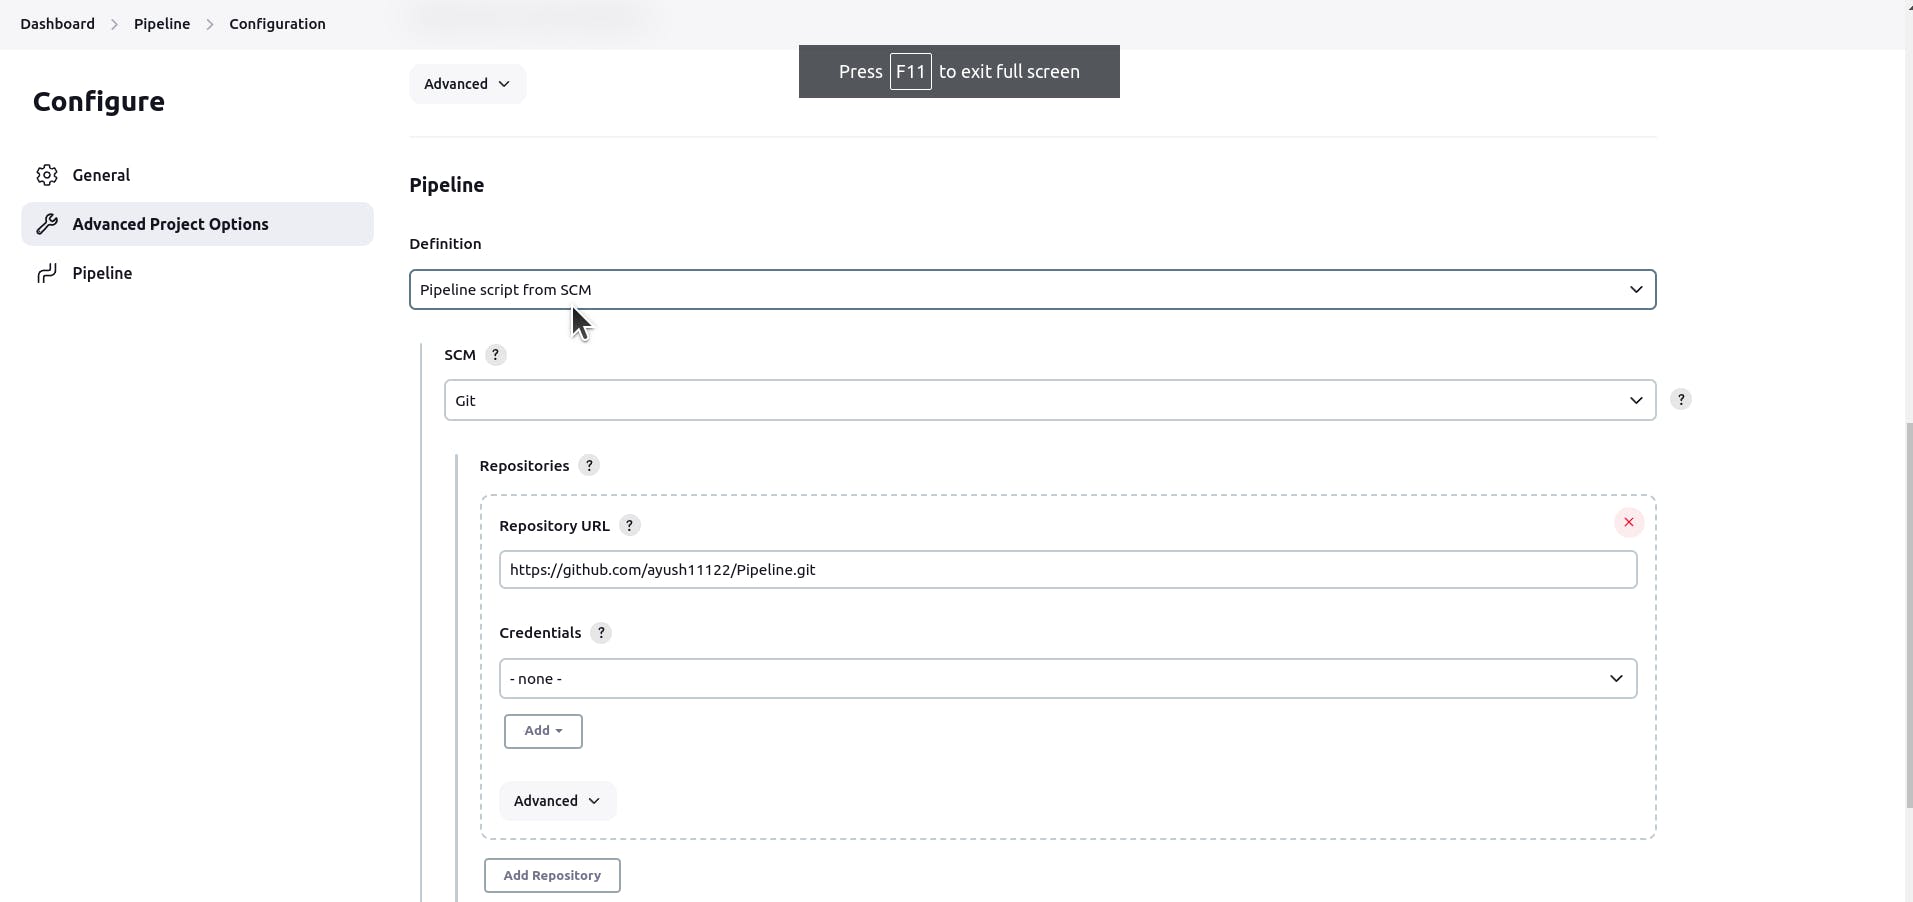
Give the Main branch, path of script and apply.
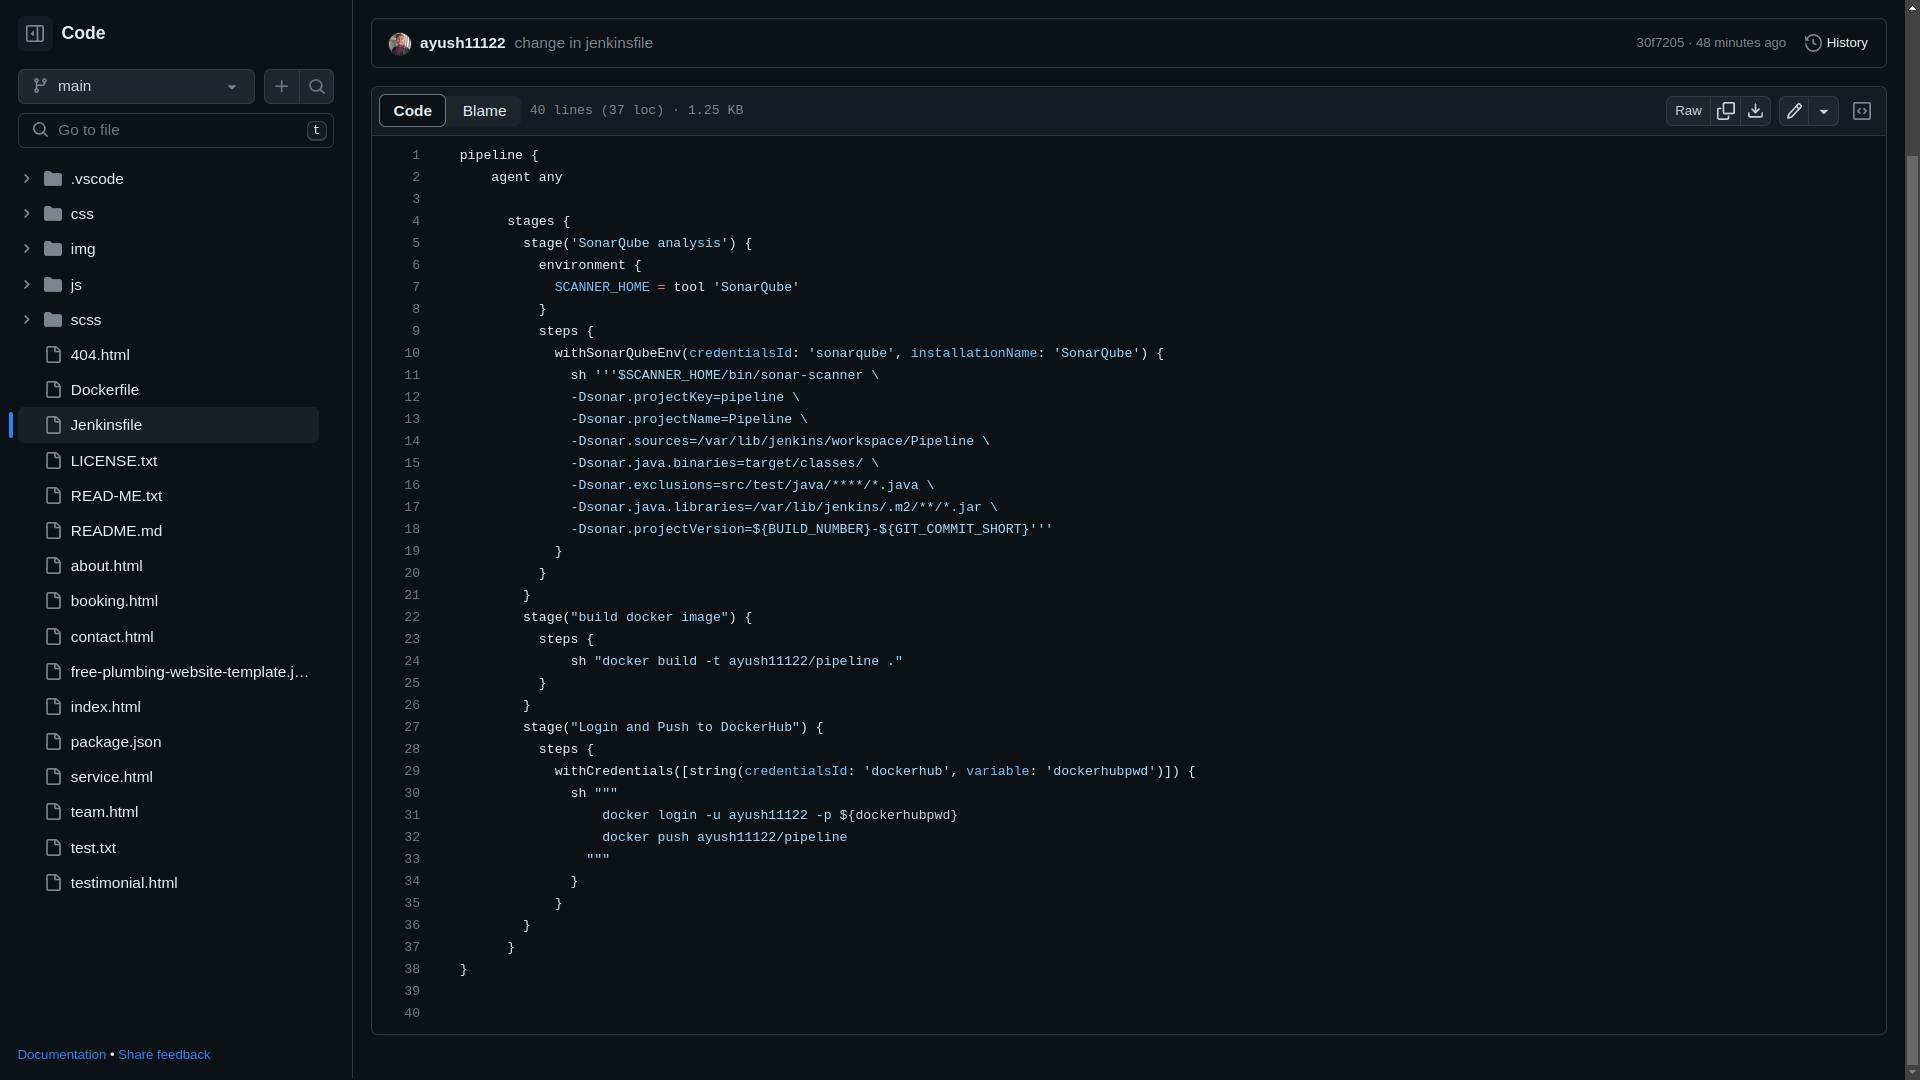
Create a Jenkinsfile and integrate it with SonarQube Project.
Go to the SonarQube server and click on Create Project.

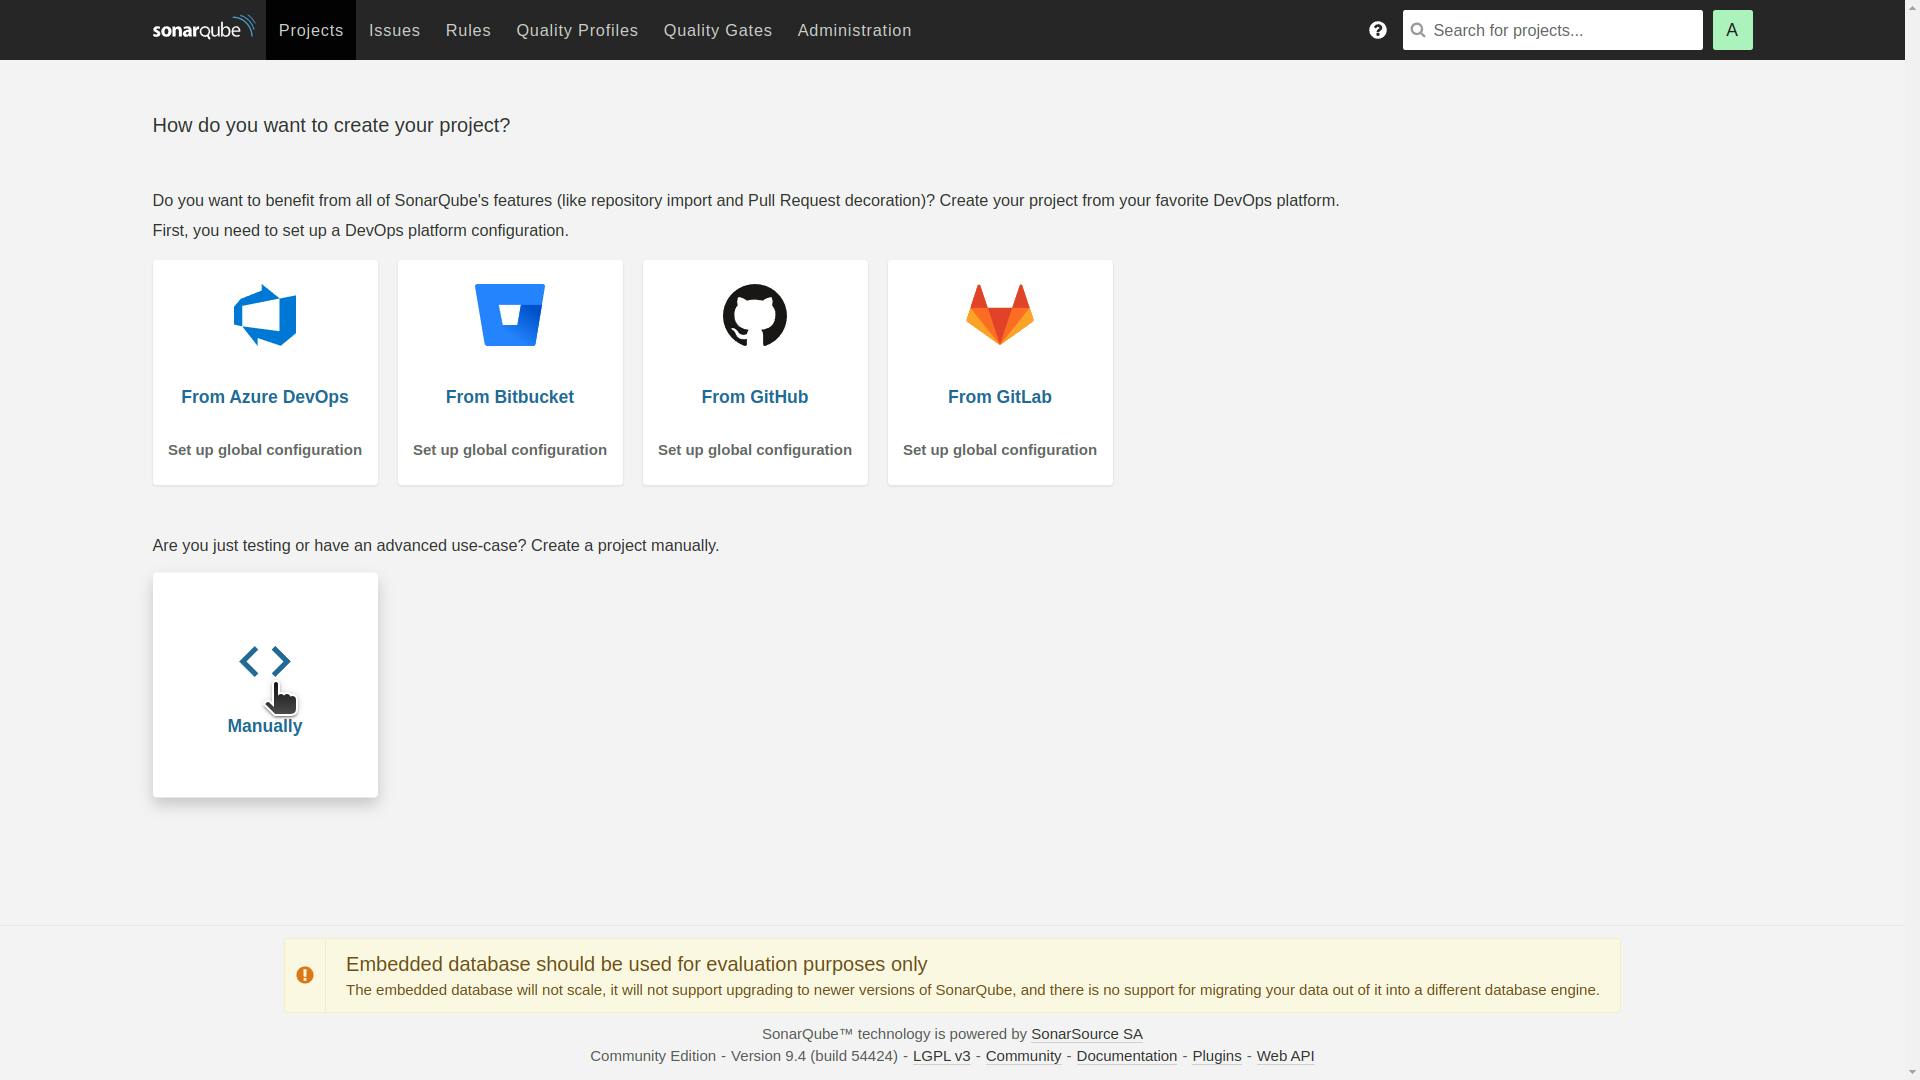
In how you want to create your project, Go to Manually.
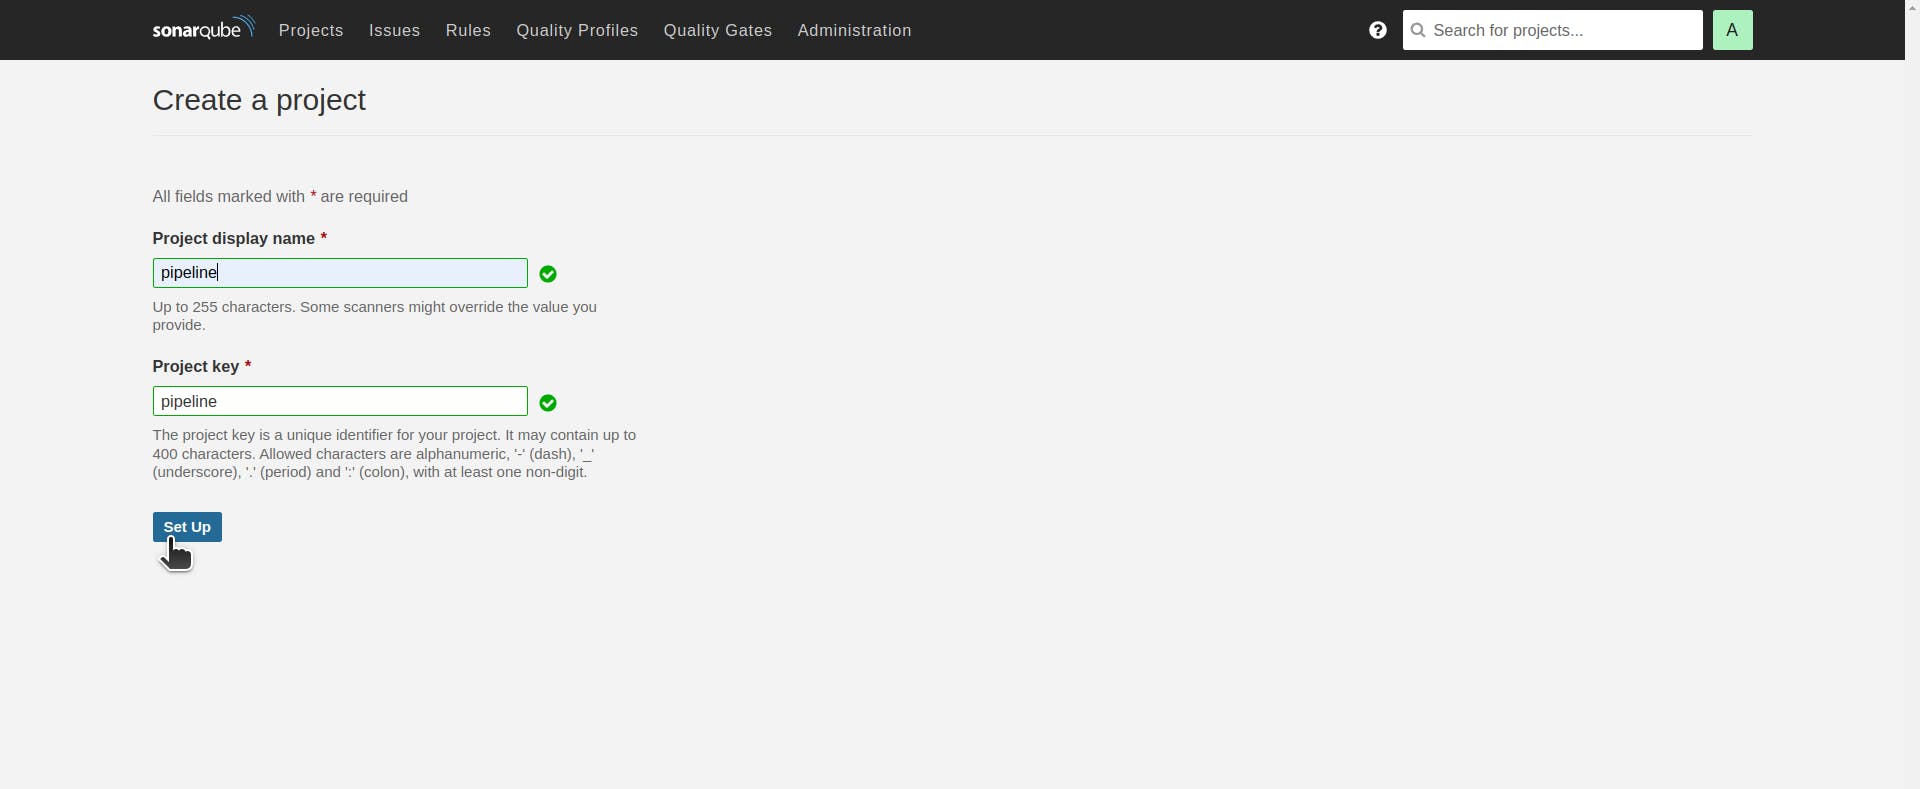
Give your Project display name and Project key.
Choose Jenkins as your CI tool.

Choose a DevOps platform.
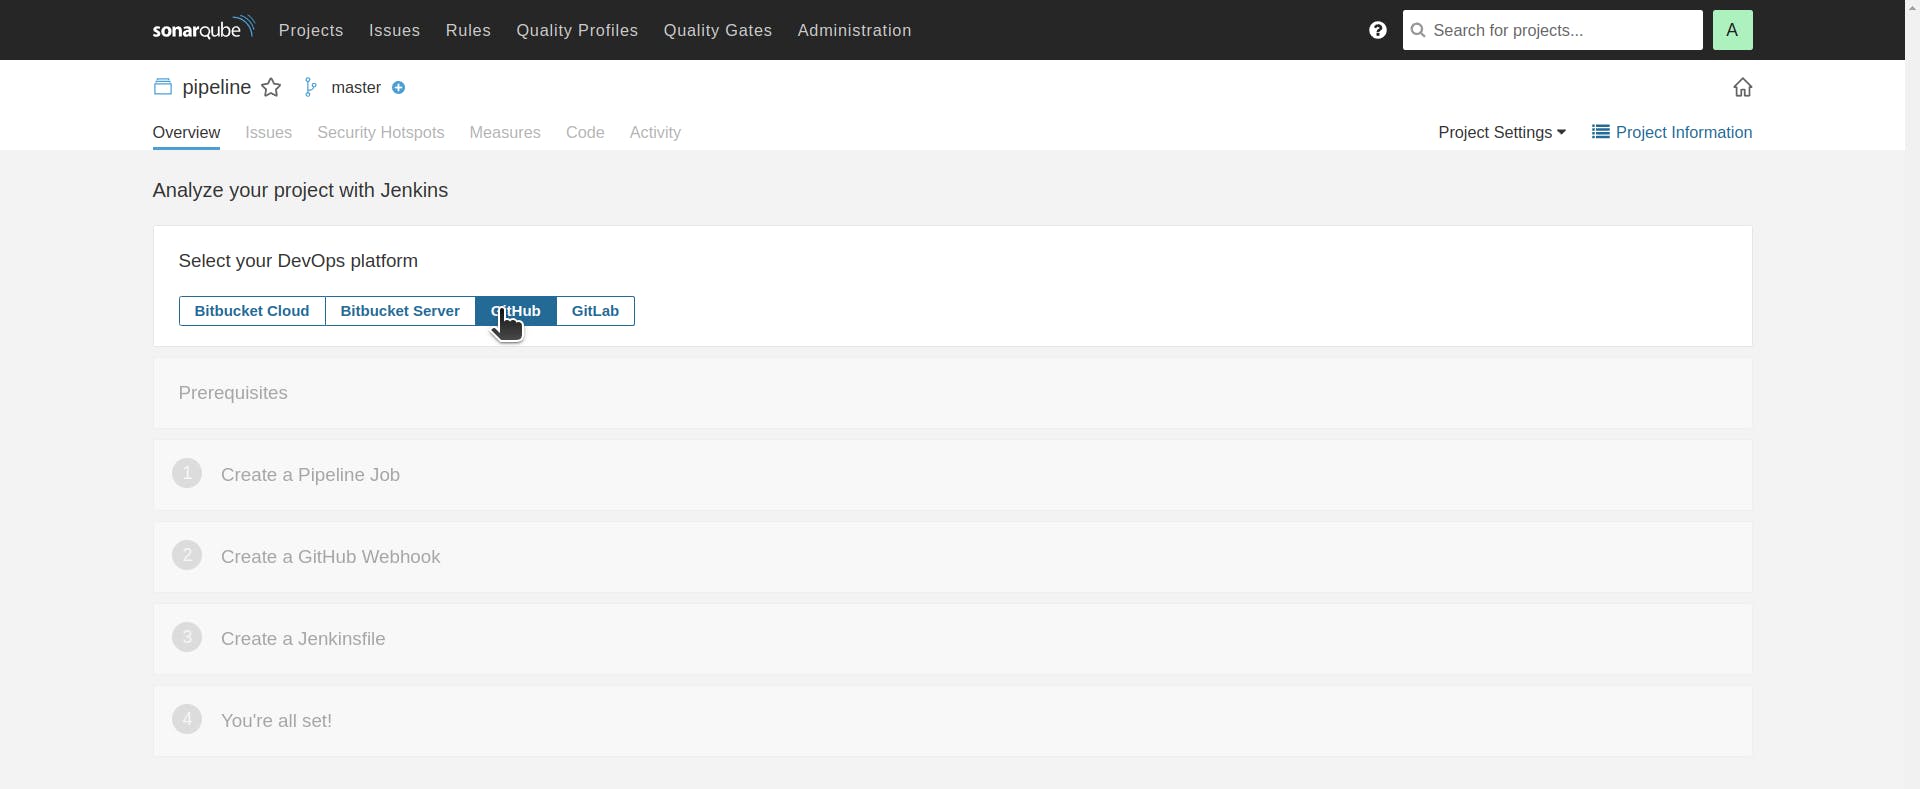
Choose your project build type.
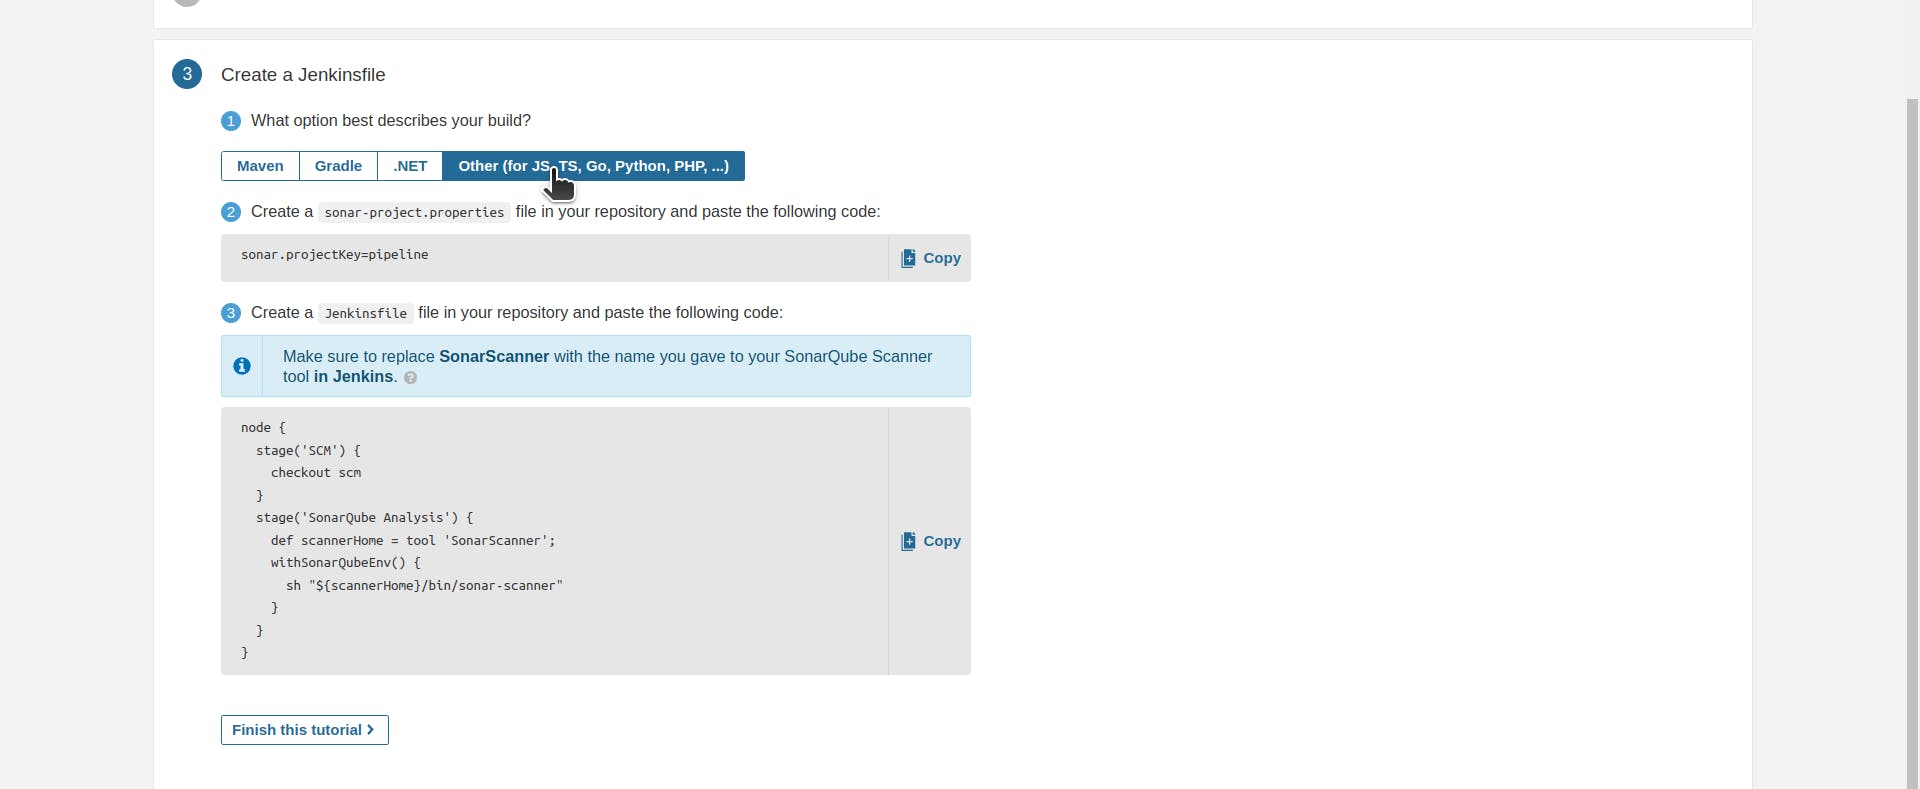
Write down your script in the form of stages and step into it according to your project type for reference go to My Jenkinsfile
Incorporate the SonarQube scanner into your Jenkinsfile to enable static code analysis. Upon successful analysis, subsequent stages for continuous integration can be executed.
Build Pipeline
After creating your Jenkinsfile go back to your Jenkins server and click on Build Now in your Job.
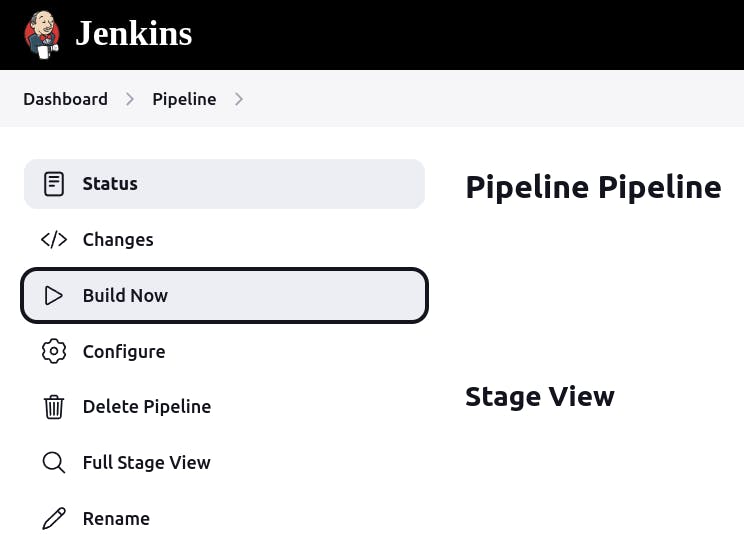
It will trigger the Job and your Jenkinsfile will get executed by which every stage in it will get executed one by one and your Continuous Integration will be done.
"The initial step of fetching the repository from GitHub, known as 'Declarative Checkout SCM,' is not explicitly mentioned in the Jenkinsfile. Instead, it is automatically executed by Jenkins based on the repository specified during the configuration of the Jenkinsfile as SCM."

For easy Continuous Integration add Github webhook.
GitHub webhook will enable real-time integration and automation between GitHub repositories and Jenkins. It allows instant notifications and triggers Jenkins-selected jobs. This facilitates seamless integration, efficient workflows, and improved collaboration.
First, go to your GitHub repository in which you want to establish Continuous Integration, then go to Settings and click on Webhooks.
Click on Add Webhook option, Give the URL of your Jenkins Server.
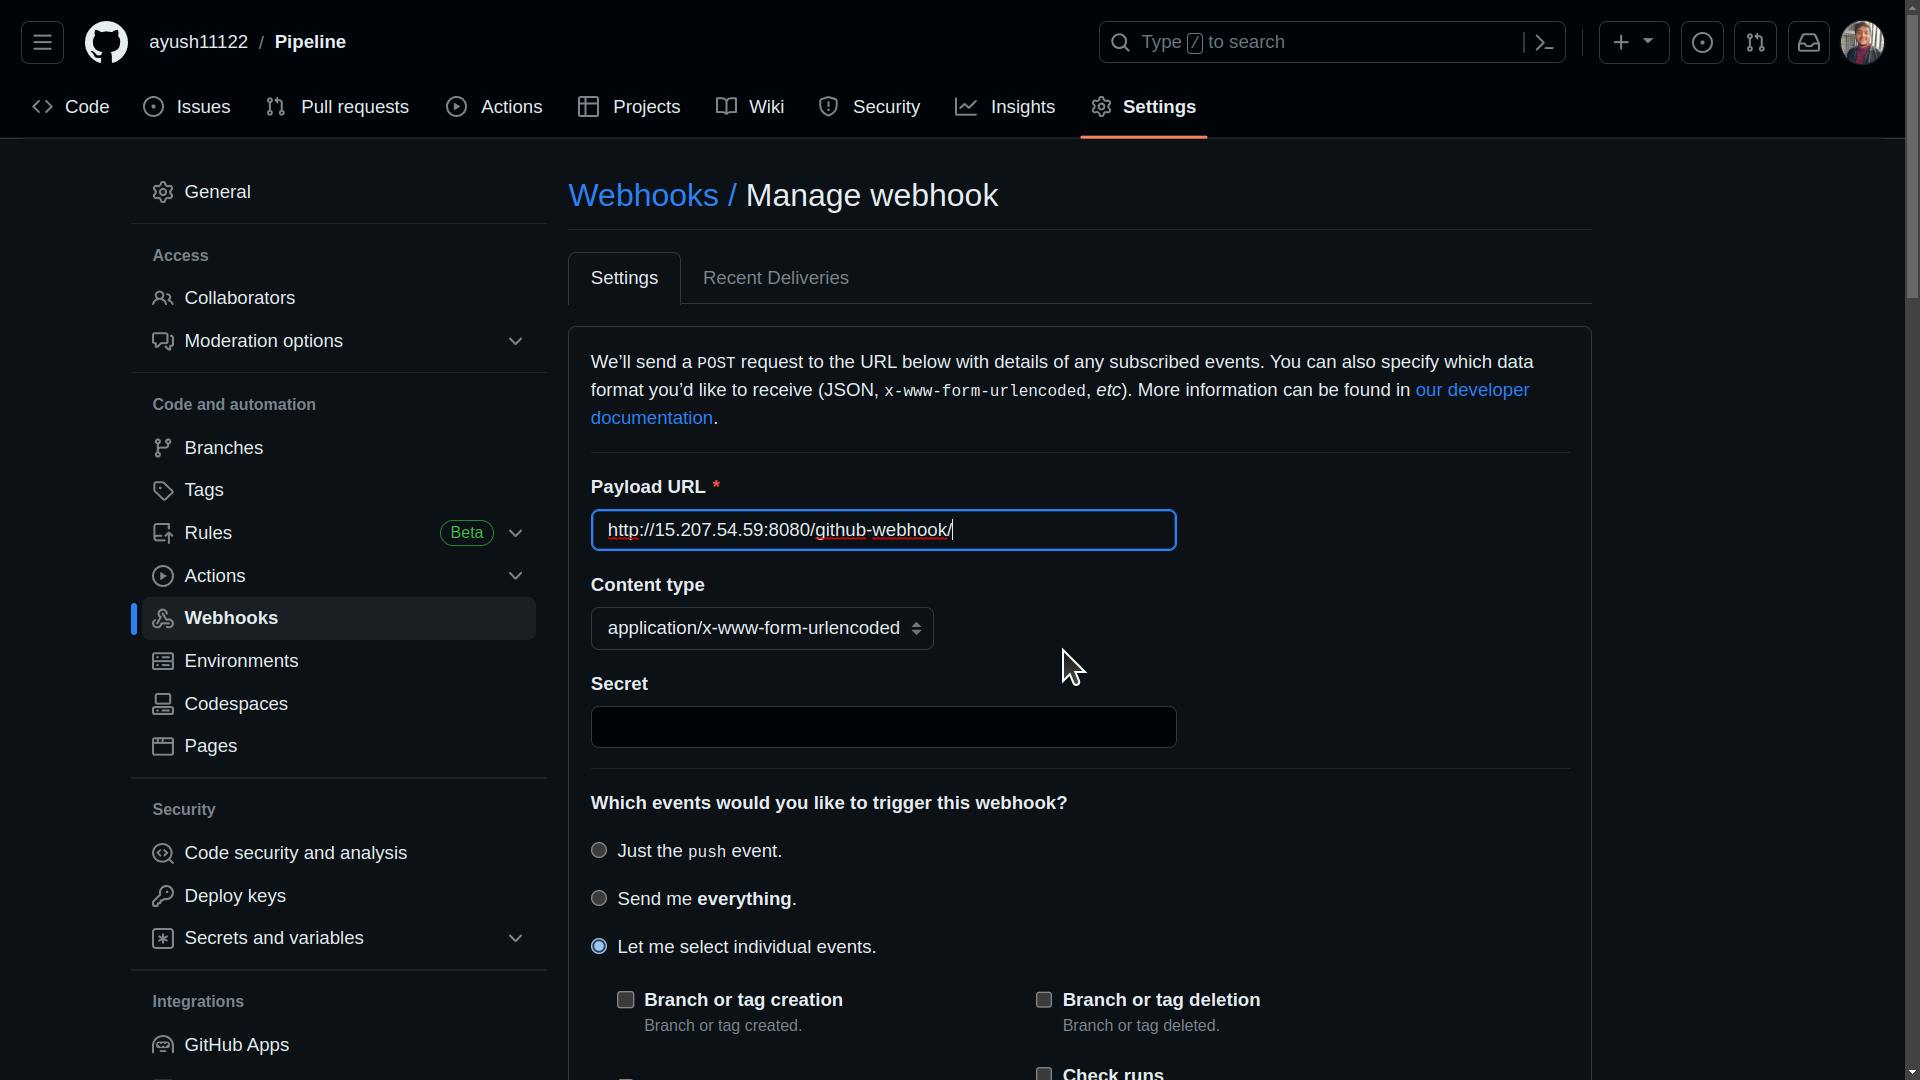
Choose all the events in which you want your webhook to get triggered and click on Add Webhook

Here Continuous Integration of your Web Application is Done!
Setup Continuous Delivery for your Web Application
For deployment purposes, we will use Amazon EKS clusters as deploying directly with Kubernetes provides the most control and flexibility but requires more effort in managing the infrastructure whereas EKS simplifies the deployment process by providing a managed Kubernetes environment on AWS.
Install and Setup AWS CLI
sudo apt update
sudo snap install aws-cli --classic
Now to check the status of AWS you can
aws --version

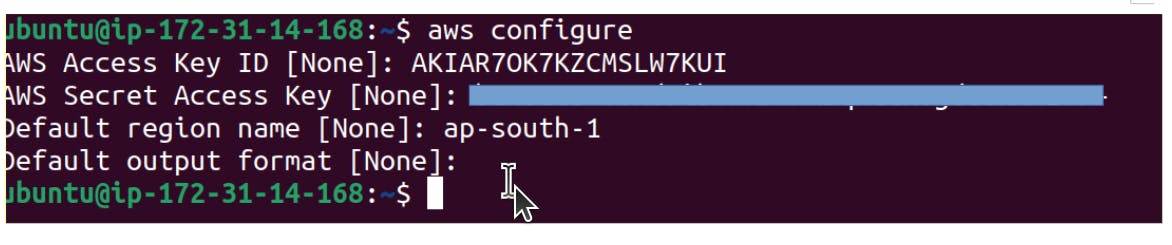
Configure AWS CLI
aws configure
Once you execute the above command it will ask for the following information -
AWS Access Key ID [None]:
AWS Secret Access Key [None]:
Default region name [None]:
Default output format [None]:
For getting these you need to go to AWS -> My Security Credentials -> navigate to Access Keys -> click on the Create New Access Key
It will give you AWS
Access Key ID,AWS Secret Access Key.


This will give you Acess Key and Secret Access Key.
This will appear for once only, so to keep it saved, you should copy it and save it somewhere because as you close it will be gone.
Alright, now we have installed and set up AWS CLI.
Install and Setup Kubectl
curl -LO "https://dl.k8s.io/release/$(curl -L -s https://dl.k8s.io/release/stable.txt)/bin/linux/amd64/kubectl"
chmod +x kubectl
sudo mv kubectl /usr/local/bin/kubectl
To download the latest version of
kubectl, you can use thecurlcommand to retrieve the binary file -> make the binary executable -> move it to/usr/local/bin
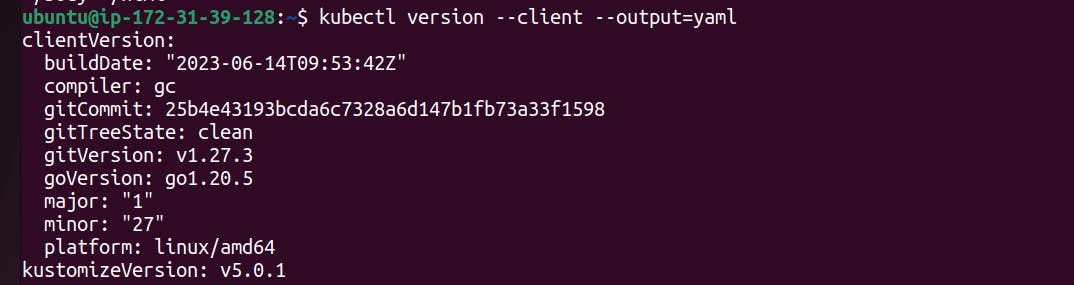
Now to confirm the installation of Kubectl, check it from client's site
kubectl version --client --output=yaml
It will show like
kubectlis the official command-line tool for managing Kubernetes clusters, and it can be used independently to interact with any Kubernetes cluster, whether it's running on Minikube, k3s, or any other distribution.
Install and Setup eksctl
curl --silent --location "https://github.com/weaveworks/eksctl/releases/latest/download/eksctl_$(uname -s)_amd64.tar.gz" | tar xz -C /tmp
sudo mv /tmp/eksctl /usr/local/bin
Verify by

Create eks cluster using eksctl
In all the previous steps we were preparing our AWS environment. Now in this step, we are going to create an EKS cluster using eksctl
You need the following detail about your cluster, as they are used in a command.
Name of the cluster: --name pipeline-cluster
Version of Kubernetes: --version 1.27
Region: --region ap-south-1
Nodegroup name/worker nodes: --nodegroup-name worker-nodes
Node Type : --node-type t2.micro
Number of nodes: --nodes 2
Here is the command -
eksctl create cluster --name pipeline-cluster --version 1.27 --region ap-south-1 --nodegroup-name worker-nodes --node-type t2.micro --nodes 2

It will take 15-20 min to create the cluster.
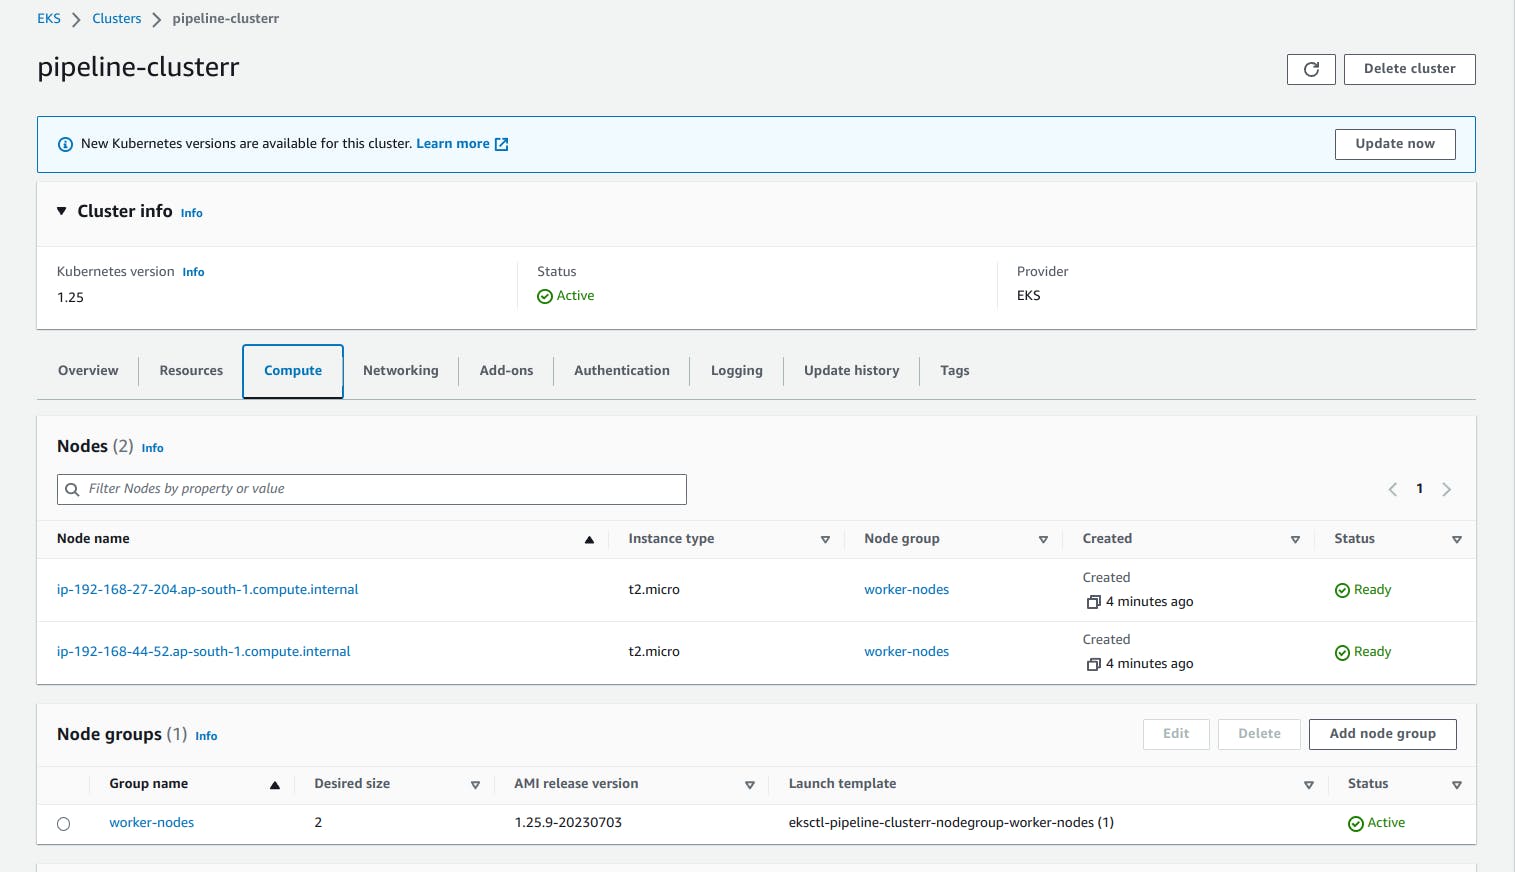
After the cluster is ready, it will be shown as this in EKS Kubernetes cluster from AWS.
Create Your Deployment and service yaml file which will be deployed over Kubernetes.

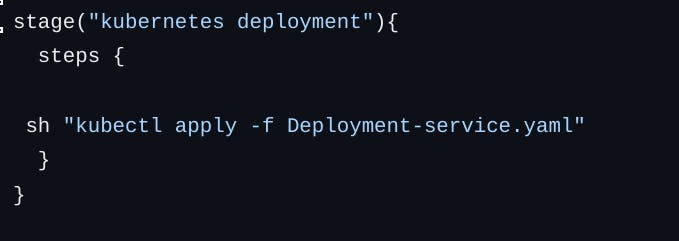
Go to your Jenkinsfile and add deployment stage.
As you will push your code to GitHub it will trigger the Jenkins pipeline which will then Deploy your Web Application over Kubernetes.
You can check your pods status by simply
kubectl get pods

There are two pods in running state.
Now


CI/CD pipeline for web application is completed.
🎉 Congratulations on Deploying Your Website! 🌐🚀
Conclusion
So we have come to the end of this blog, you have learnt about how to successfully deploy your website on Kubernetes using CI/CD Pipeline. I have tried to make this blog beginner friendly, explaining each part step by step. In case if you have any doubts regarding this, feel free to DM me.
If you found this blog helpful, do like and comment your thoughts.
Thanks for reading. 🤗💙